

The polymer cements we use require less limestone and lower processing temperatures than traditional portland cements, meaning a smaller carbon footprint and steps toward a greener Earth
The polymer cements we use require less limestone and lower processing temperatures than traditional portland cements, meaning a smaller carbon footprint and steps toward a greener Earth

You have found the concrete repair and restoration specialists
Have your concrete surfaces seen better days? Between weather extremes and daily use, your concrete takes a lot of wear and tear. A small crack or a bit of spalling can lead to larger issues if left unchecked. A Plus Concrete & Foundation Repair can help you stay ahead of big problems by repairing and protecting concrete.
We specialize in concrete crack repair, spalling repair, re-cornering work and more. We can properly clean concrete with high power pressure washing, seal, resurface, and supply a state-of-the-art protective coating to the concrete. Each concrete project has its own needs. You wouldn’t want to apply the same products to a driveway that you would a porch. We have done the research and tested with experience to know exactly which applications are best suited for your specific concrete restoration.

We provide concrete restoration services for:
If you want your concrete surfaces to look fresh and be protected, call us at A Plus Concrete & Foundation Repair today. We're located in Bridgeville, PA and service Allegheny, Butler, and Washington Counties. Call us for a free estimate on concrete restoration services.
Hover over to view
 April 2022. Here is the existing bowing wall.
 April 2022. The wall was grinded down, and the bottom anchors were installed.
 April 2022. Here is another view of the installed bottom anchors.
 April 2022. The Top Neckties are now being installed.
 April 2022. Another view of the installed Top Neckties.
 April 2022. The Carbon Kevlar Fiber stabilizing straps are being installed.
 April 2022. This is another view of the installed straps. The cracks were filled in with epoxy (green colored lines).
 April 2022. This is the final view of the completed three-point system, which is also I.C.C. Certified.
 This is an exposed aggregate patio and driveway. It is not supposed to be light in color. Rather than looking decorative as intended, it looks like plain concrete with rocks in it.
 The patio and driveway were power washed, and you can see where the Browntone is being applied. Browntone is an enhancer/sealer designed exclusively to treat exposed aggregate.
 Here’s another view of the work in progress. You can clearly see the difference in the richness between the two areas.
 The work is almost complete.
 In addition to the Browntone, our crew also addressed existing expansion joints on the sidewalk that were in need of repair.
 Here is the completed sidewalk.
 This is a striking view of the difference between “before” and “after.”
 A view of the completed driveway. It is completely sealed from any salt intrusion.
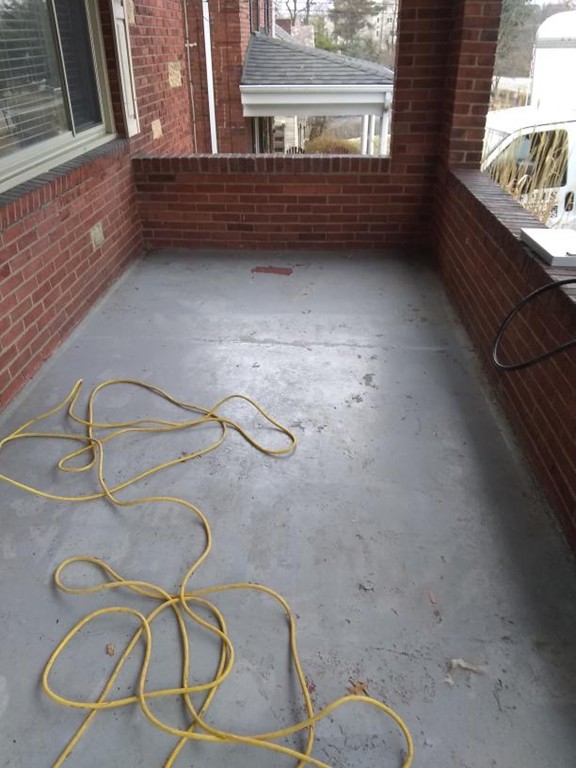
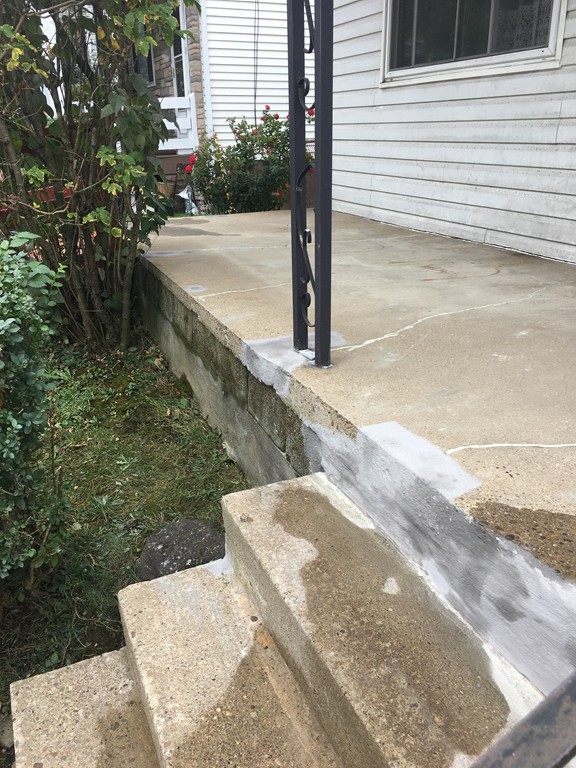
 March 2022. This is a before photo of the porch. There are numerous cracks that are causing water to leak into the supply room below.
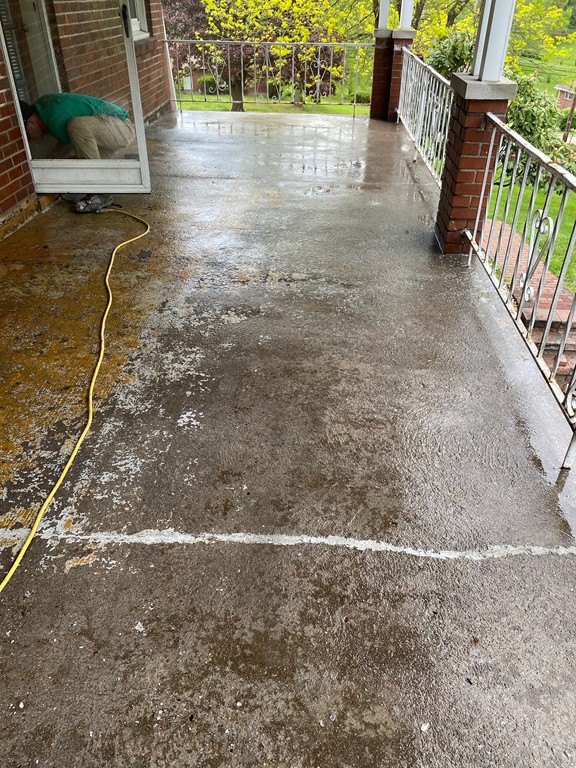
 March 2022. The porch was power washed and repairs are in process.
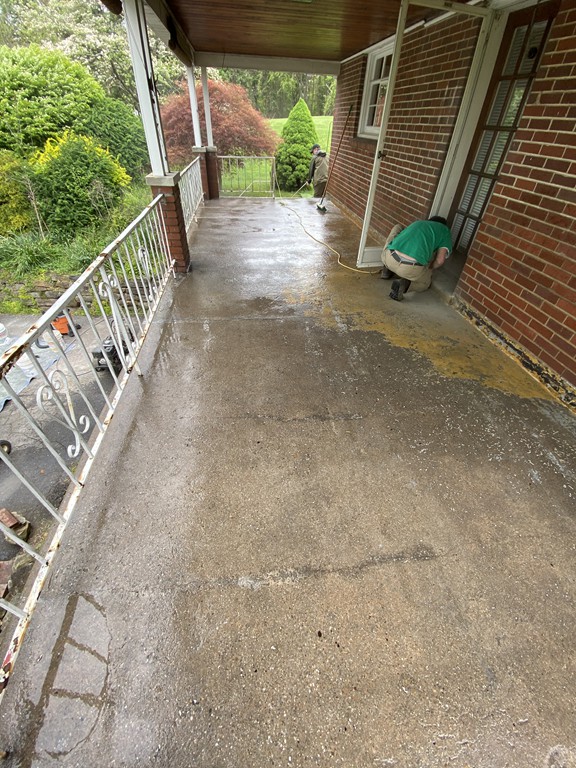
 March 2022. Additional repairs are being made.
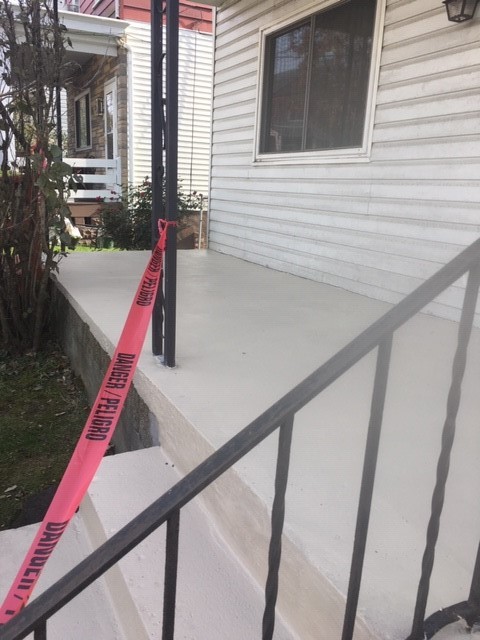
 – March 2022. This is the finished product. FlexKrete was used for the repairs with sand broadcasted for long-term wear, and to assure there is no future leaking below.
 March 2022. This is another view of the finished work.
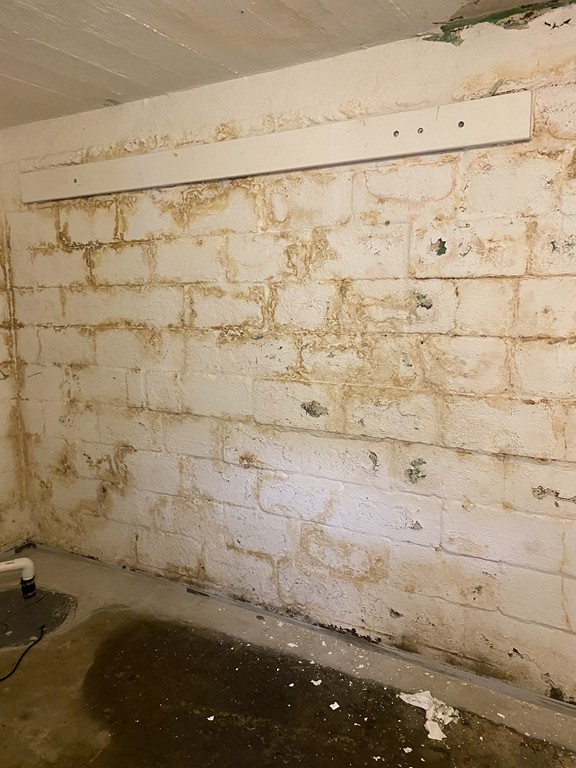
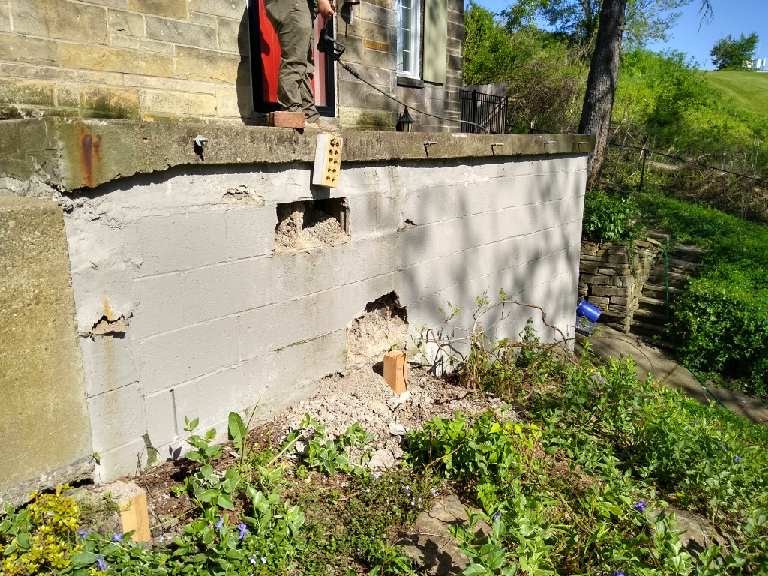
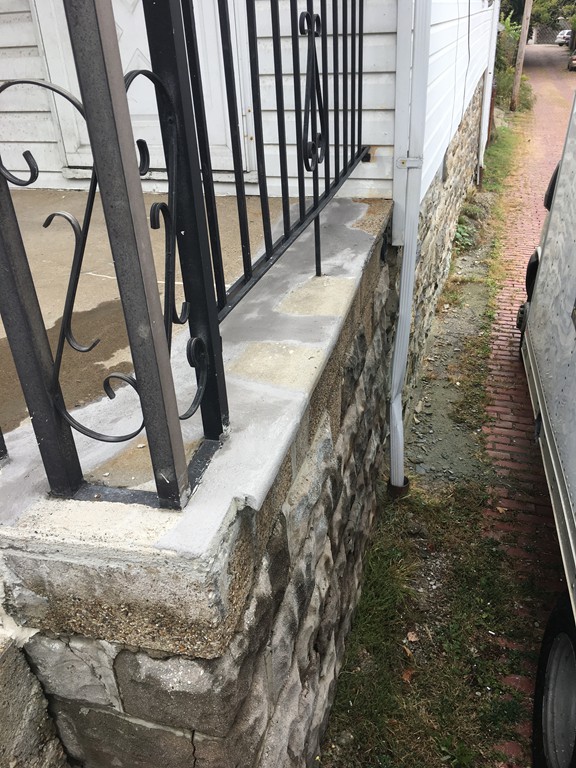
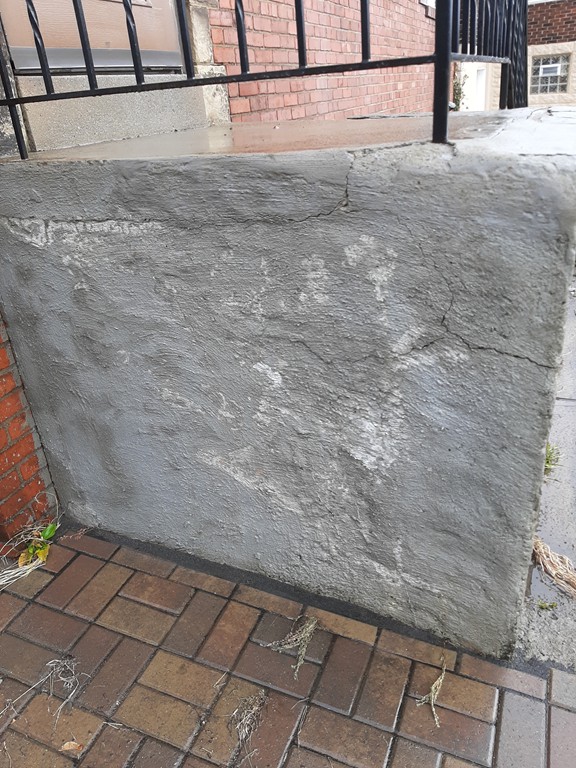
 This is a photo of a bowing basement wall.
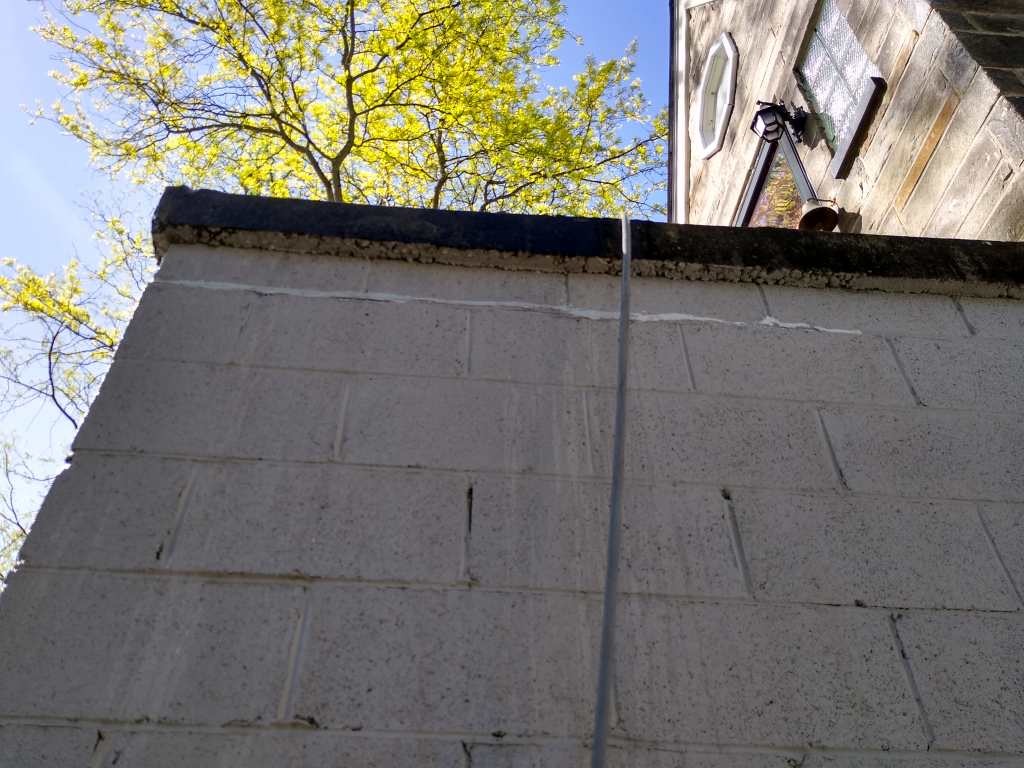
 Here is another view of the bowing wall.
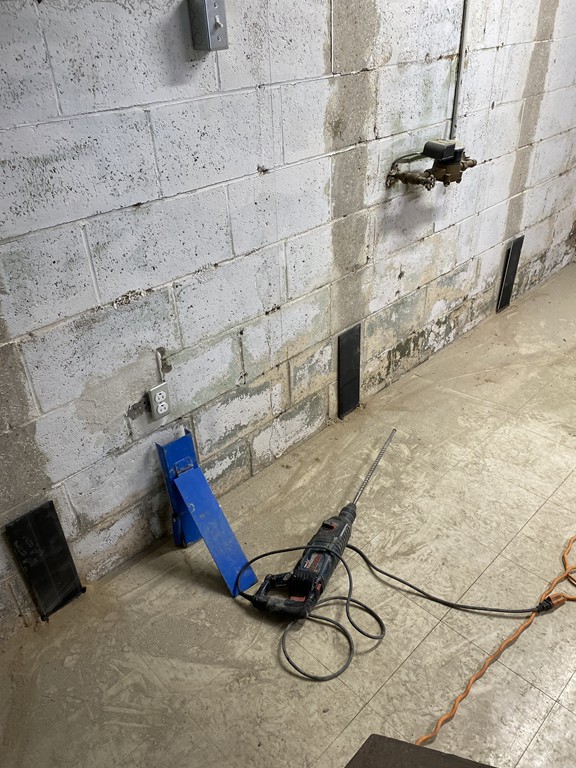
 March 2022. The wall was grinded down to the raw cinder block, so that it’s ready to accept the stabilizing straps.
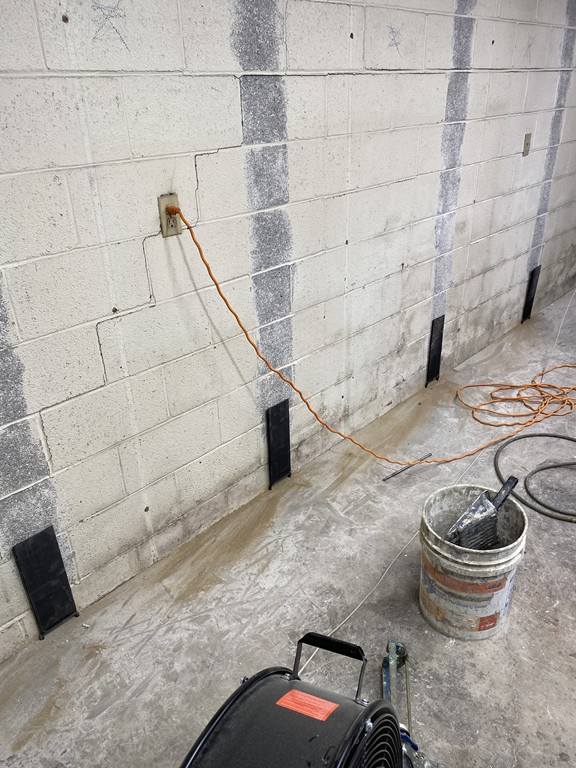
 March 2022. The neckties (top anchors) and sheer plates (bottom anchors) have been installed.
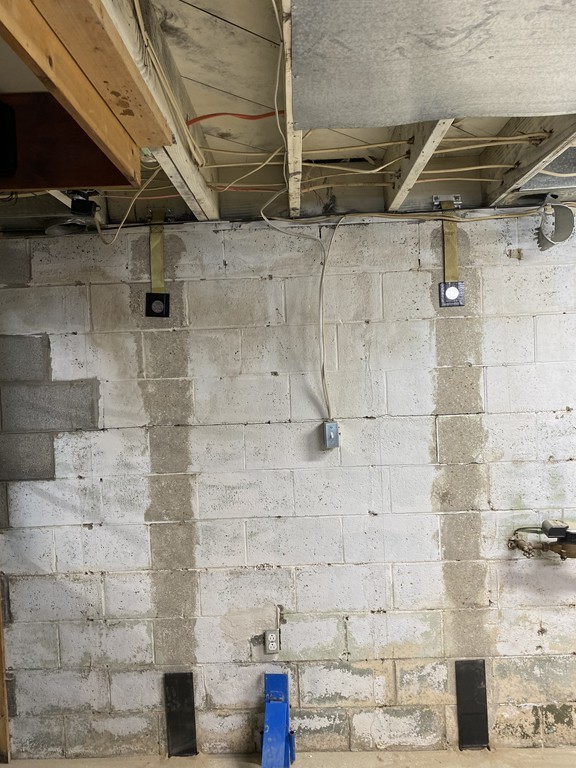
 March 2022. Another view of the neckties and sheer plates.
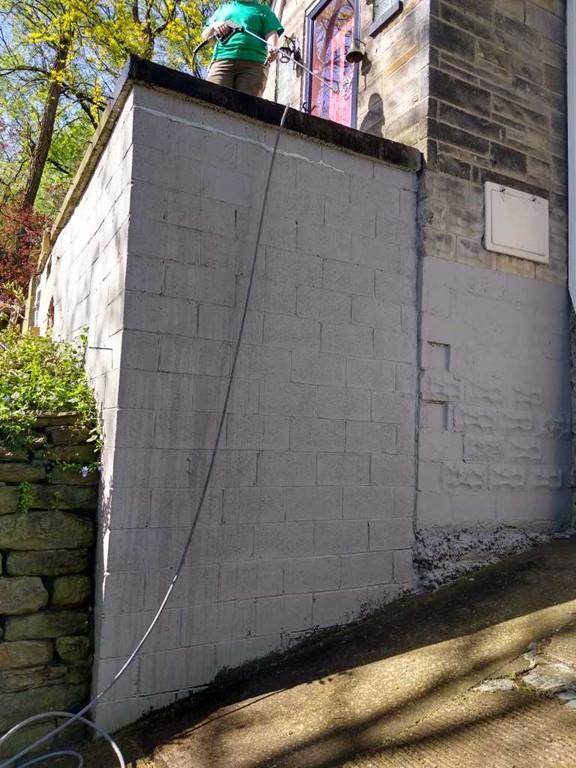
 March 2022. The carbon Kevlar fiber straps were installed and the job is complete. The Fortress Invisibeam system is ICC-ES Certified.
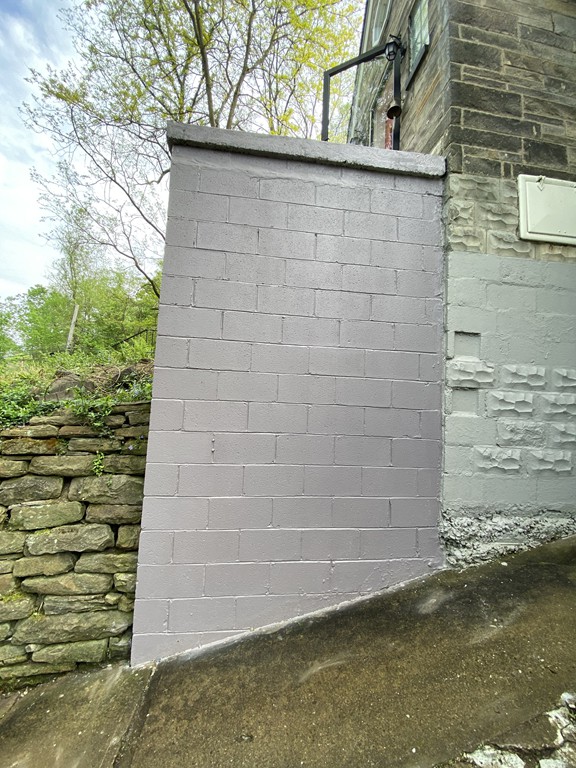
 March 2022. This is another view of the completed installation. Fortress Stabilization provides a Lifetime Warranty on this work, and it’s transferable to a new owner.
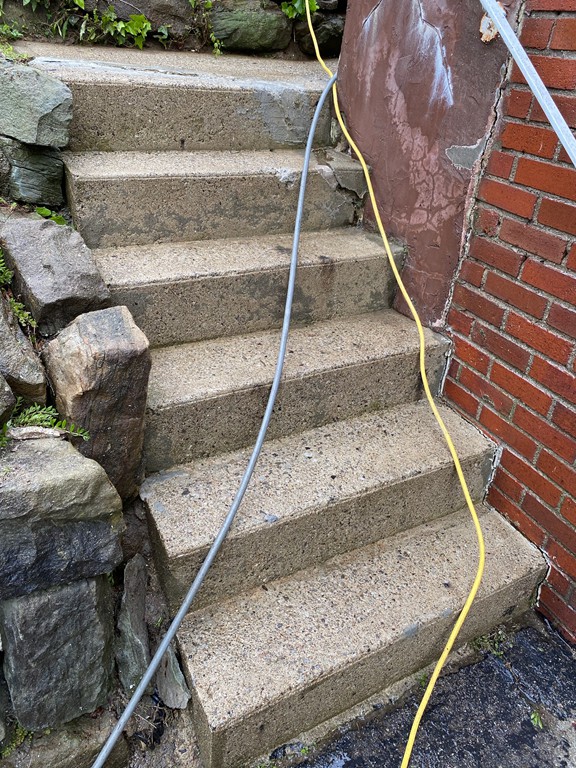
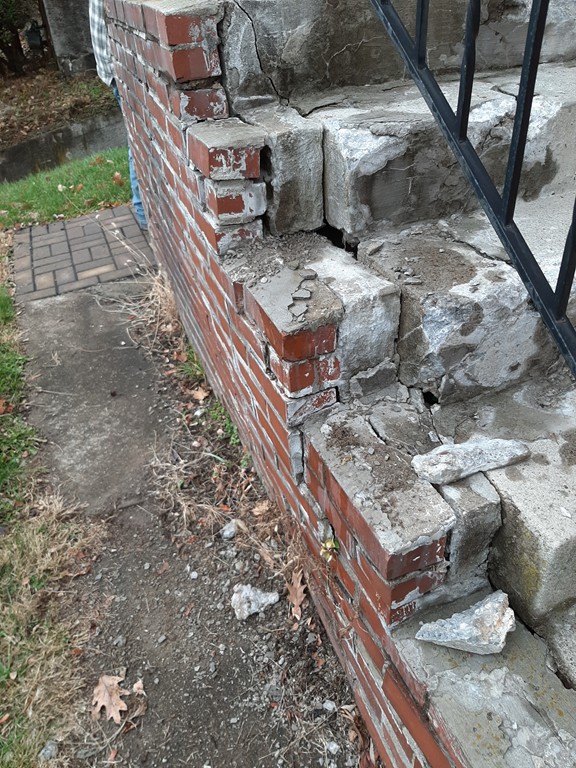
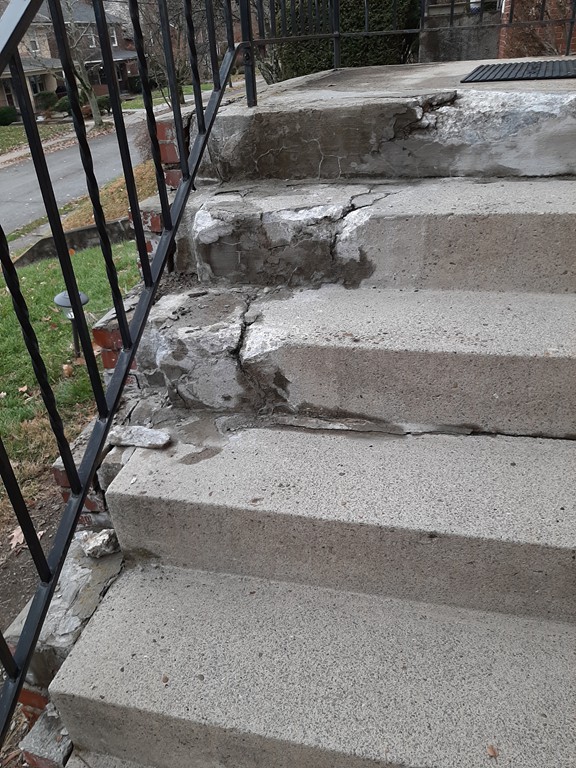
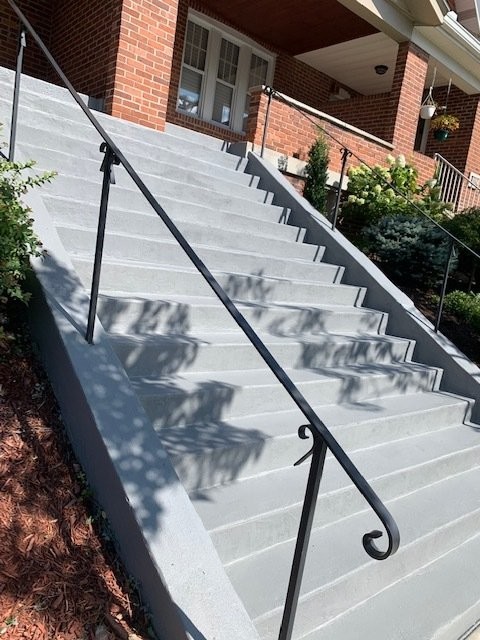
 These stairs are in need of major repairs.
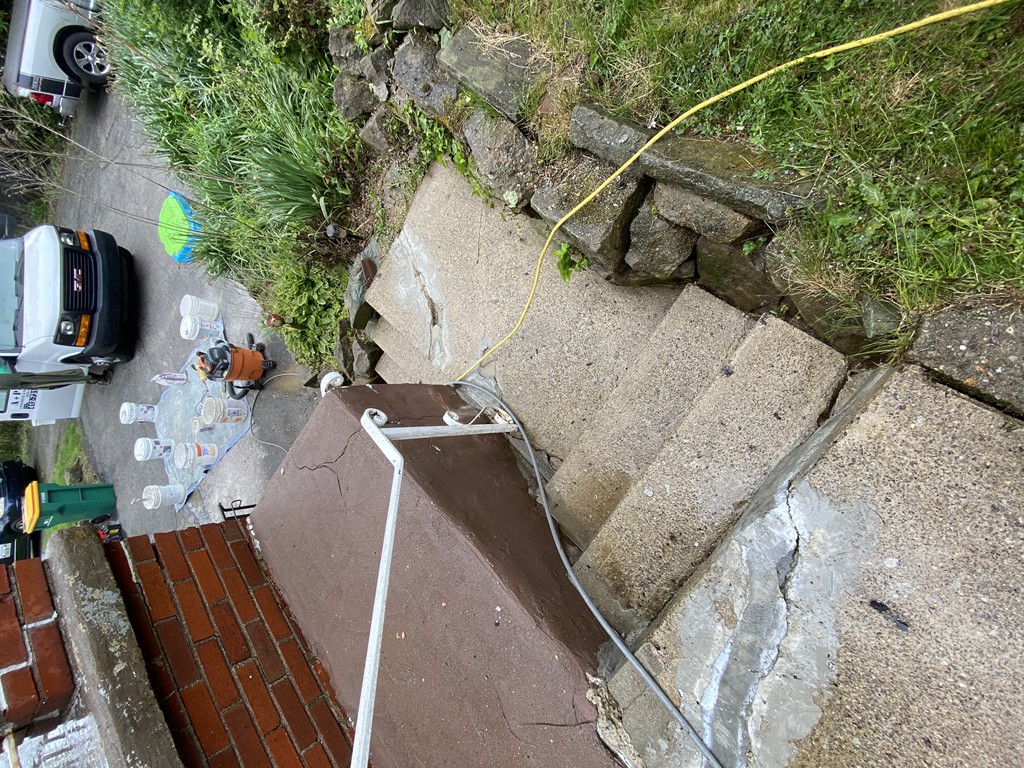
 This is the sidewalk leading up to the stairs shown in the previous picture. It is also in need of major repairs.
 We are in the process of rebuilding the damaged stairs.
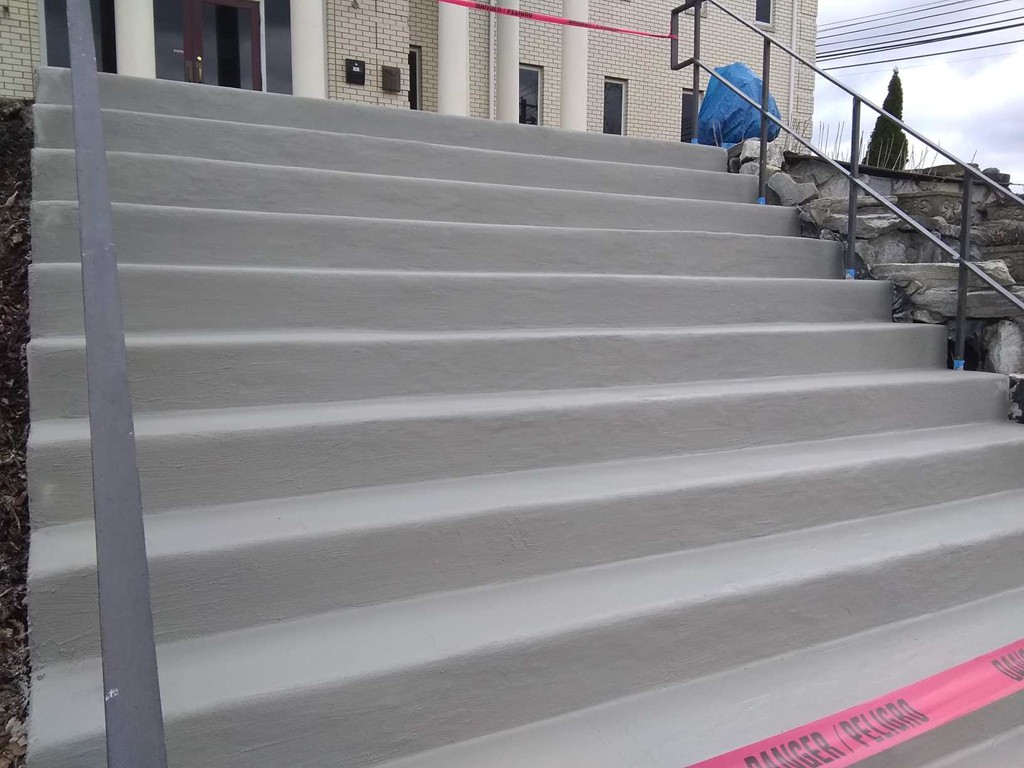
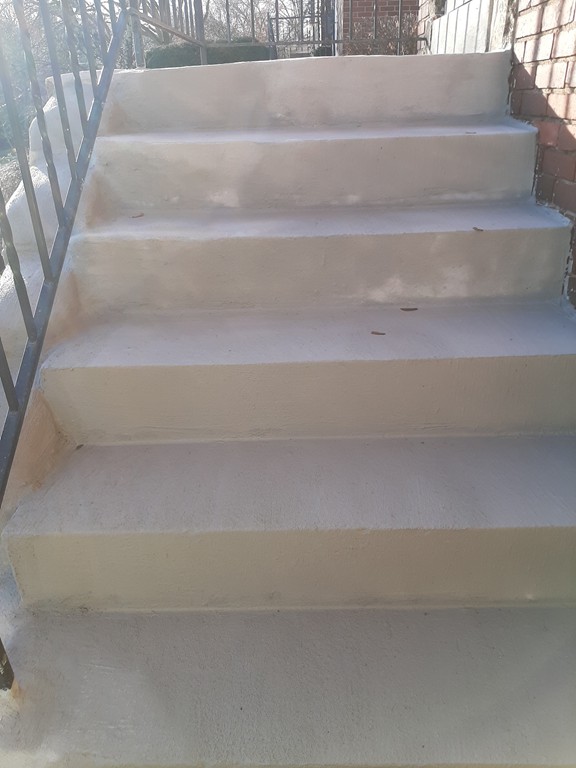
 All of the repairs were made. The steps were rebuilt and resurfaced.
 The sidewalk repairs were made and the sidewalk was resurfaced. A dramatic improvement for the customer!
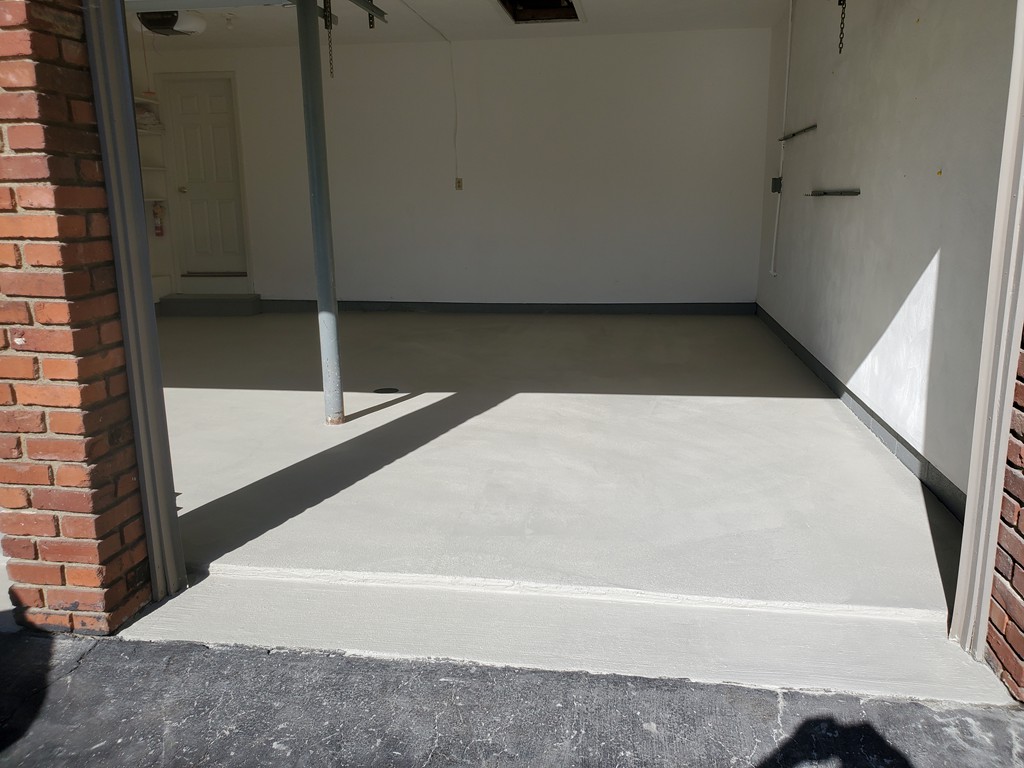
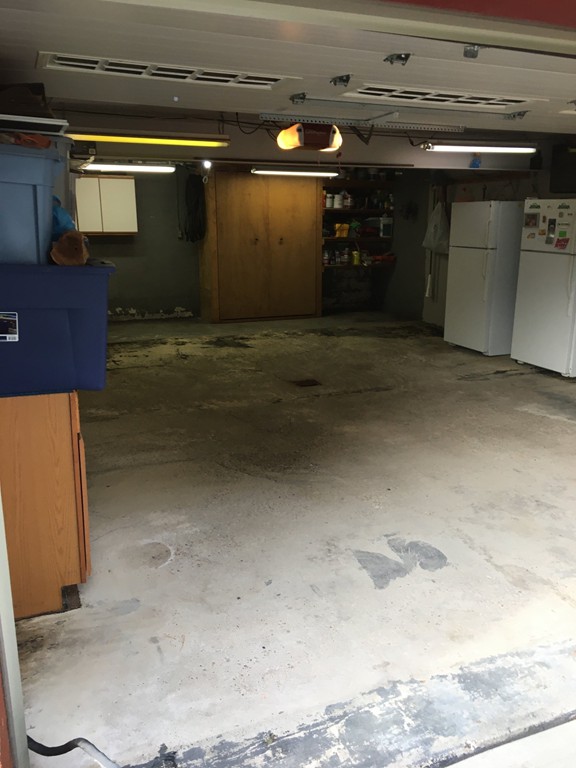
 This is a photo of the garage floor. Note the spalling from salt damage and the many cracks throughout the floor.
 Another view of the garage floor showing the same issues.
 A close-up of a particularly damaged area.
 A close-up showing more cracking.
 This is the photo! The spalling and cracks were all repaired. The floor was resurfaced and Concrete Guard was applied to protect the floor for many years to come.
 Another view of the finished product.
 Our customer is very pleased with the results!
 This is the photo of a porch and step that are in need of repair. You can see spalling and discoloration from salt damage.
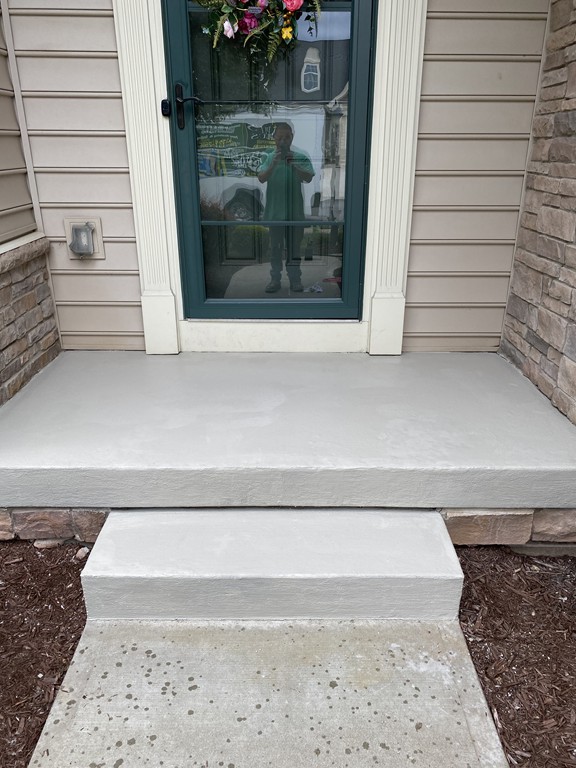 This is the photo. Following repair and resurfacing, the porch and step look like new!
 This is how our customer’s exposed aggregate driveway looked when we arrived. Note how discolored and dirty it is.
 Our customer also asked us to refresh their exposed aggregate sidewalk.
 This shows the before (left side of the photo), and after images (right side of the photo). Note on the “after” side, the addition of the Browntone enhancer/sealer and how it brightens and refreshes the aggregate.
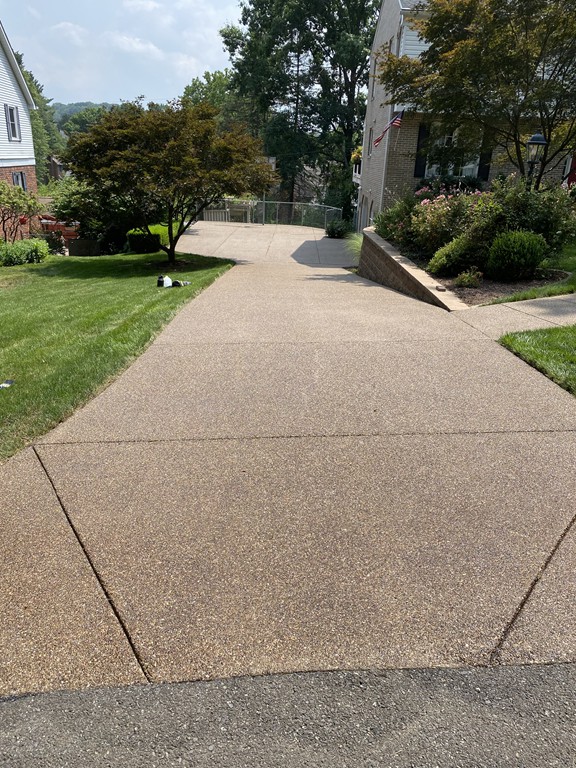 Here is the finished driveway. The bottom of the photo shows where the driveway meets the street. You can really see how much lighter and brighter the driveway looks!
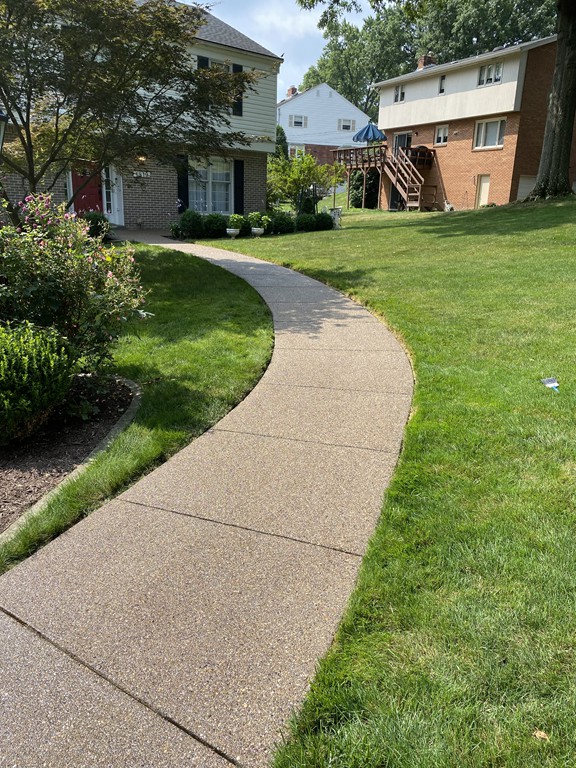 Here is the finished sidewalk. We applied the Browntone enhancer/sealer to it as well.
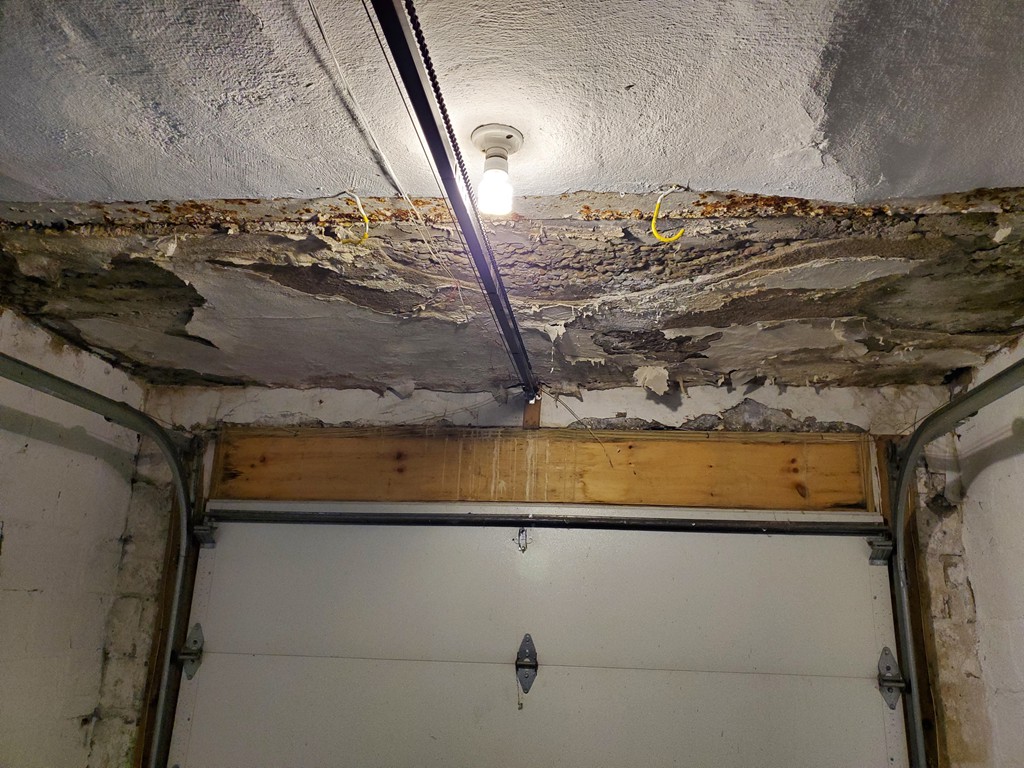 This is a garage ceiling showing extensive water damage due to leakage from above.
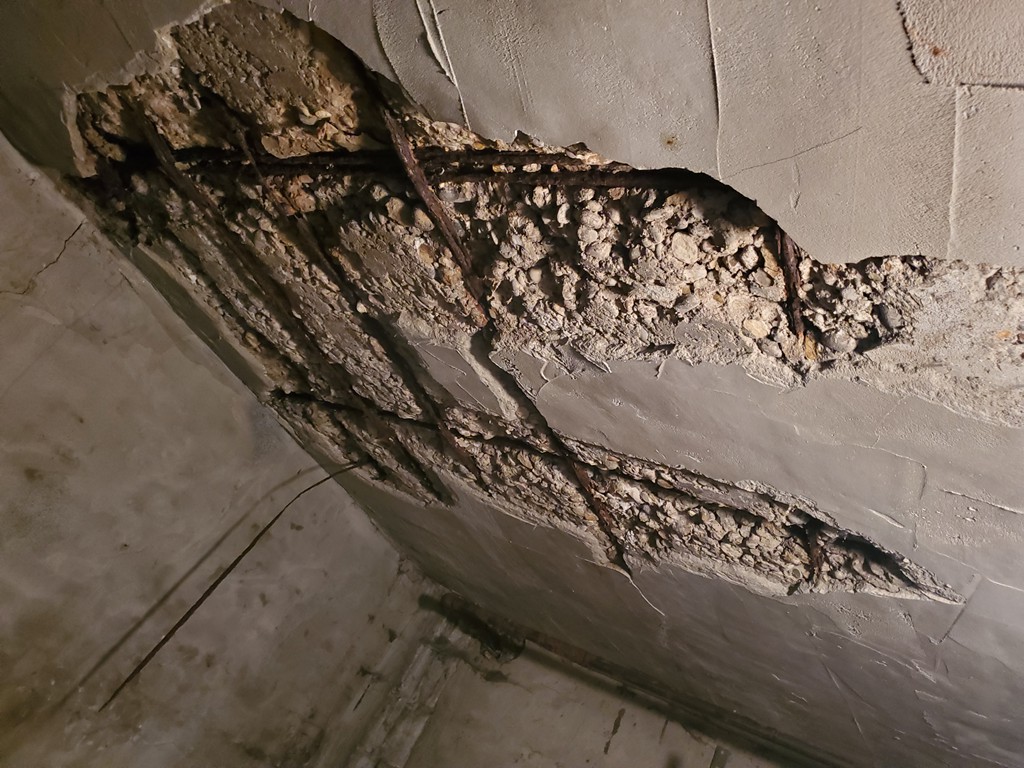 This is a close-up of some of the damage. Note how the rebar is exposed and the concrete is crumbling.
 Our team was able to seal the concrete above the ceiling, so no further leakage will occur. Then, we repaired the garage ceiling and gave it a new surface.
 A closer look at the repaired garage ceiling.
 Another view of the garage ceiling repairs.
 This porch is in need of resurfacing. Notice the peeling paint and cracks in the concrete.
 Here’s another view of the original porch.
 Here is the porch after the resurfacing was completed.
 This is another view of the new, smooth surface.
 The home owner is very pleased with the final product!
 This is the original driveway that is approximately 20 years old. As you can see, there are multiple issues.
 A close-up of one of the driveway issues.
 More detail on the original driveway.
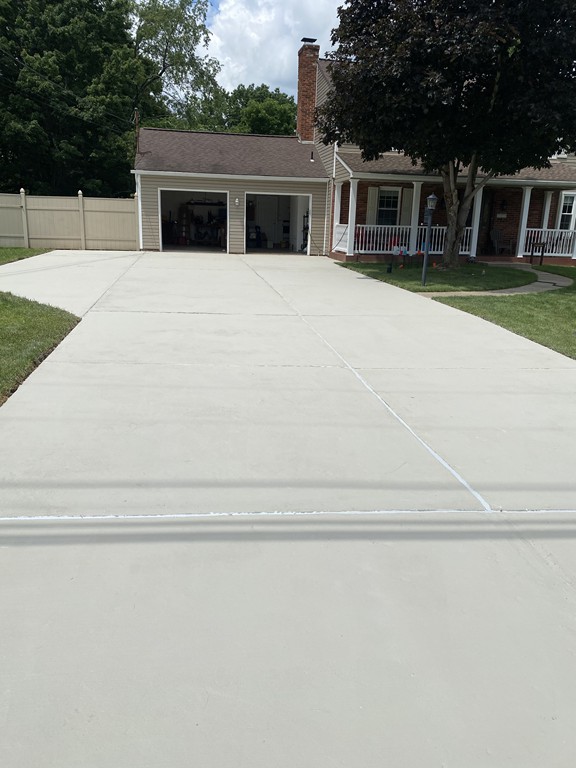 The Finished Product! We filled the expansion joints with urethane; applied polymer resurfacer to the entire driveway and finished the project with a coat of Concrete Guard.
 Another view of the finished driveway.
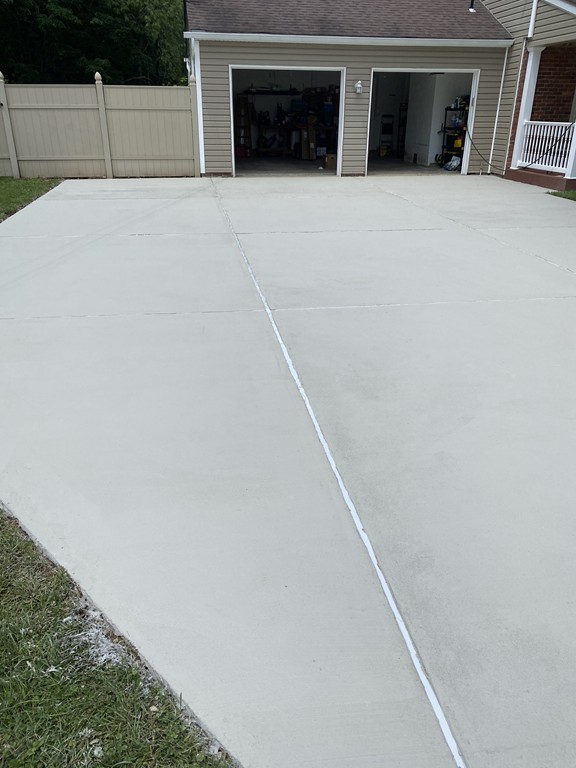 The customer was VERY pleased with the results, which were much more cost effective than replacing the driveway.
 These are relatively new steps, but had a finish that was inconsistent in color.
 picture of the steps. They have been power washed, resurfaced and sealed with Concrete Guard.
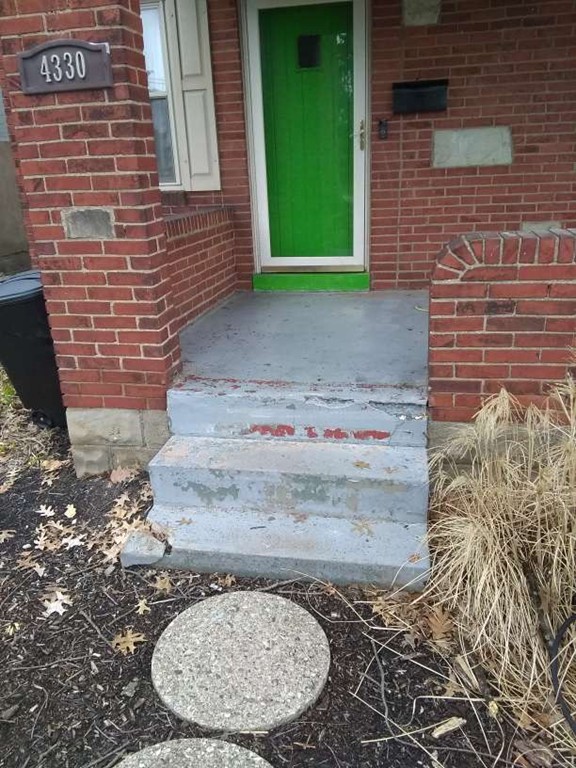
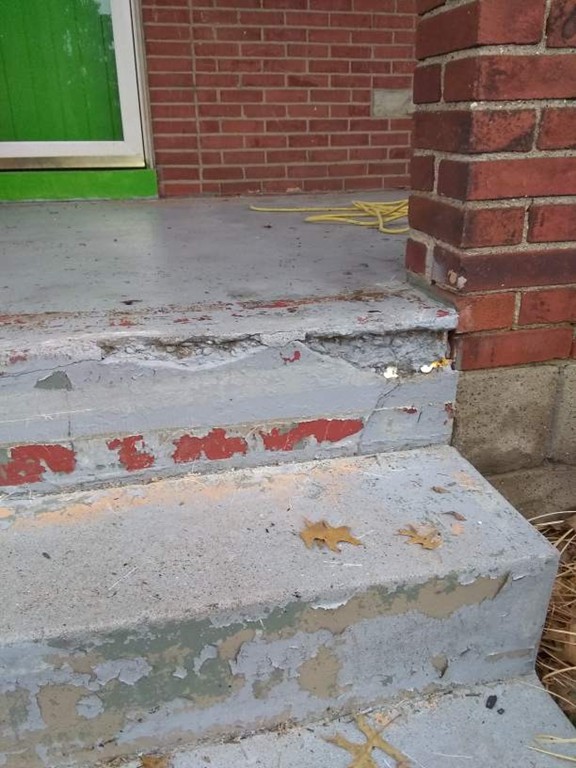
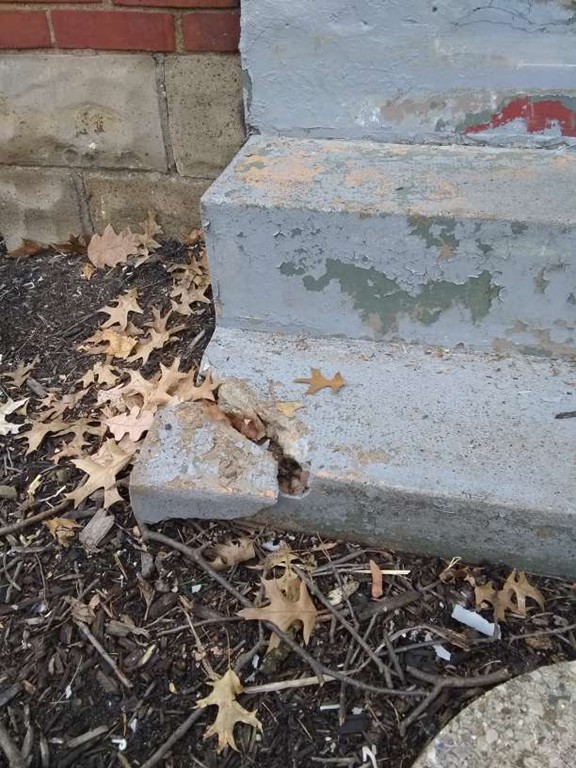
 Porch, step repair – the porch and adjacent steps are spalling and crumbling on the edges. There are also visible cracks on the porch.
 Porch, step repair – here’s a better look at the front of the porch, step and sidewalk.
 Porch, step repair – the porch and step have been repaired and resurfaced.
 Porch, step repair – the finished product! It looks brand new.
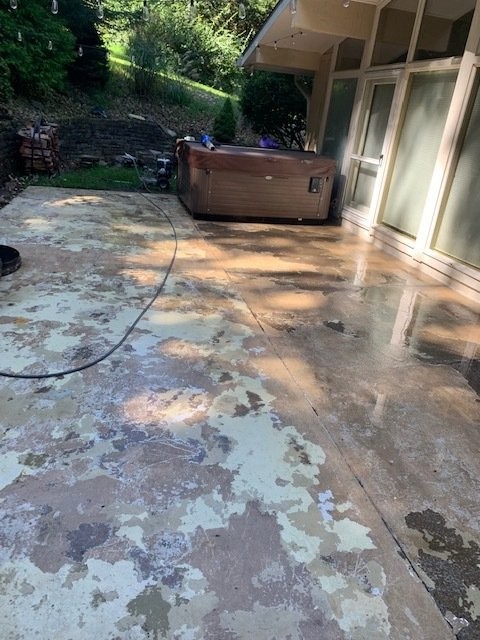
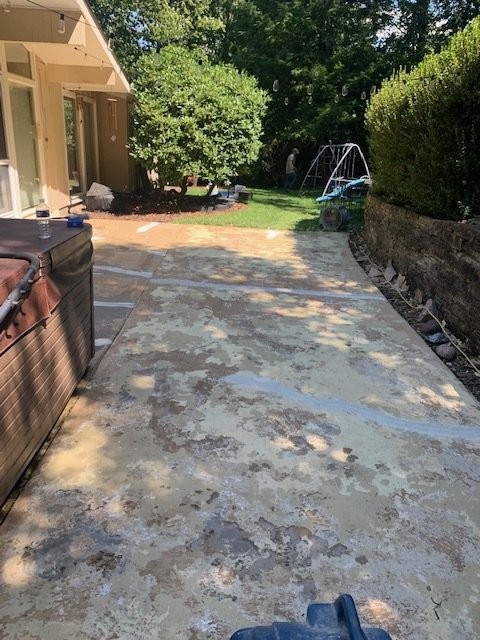
 The original garage floor is spalling and cracking. The floor is also uneven near the back wall.
 Another view of the original garage floor.
 The spalling is very visible in this photo.
 Polymer cement was applied to areas of the floor that needed to be repaired.
 Another view of the polymer cement application.
 This is the completed, resurfaced and sealed garage floor.
 This garage floor shows significant spalling and crumbling.
 Another view of the spalling and crumbling.
 Our crew has begun working on the project. The surface was power washed and repairs are in progress.
 The floor was resurfaced following the completion of repairs.
 Here is the finished product.
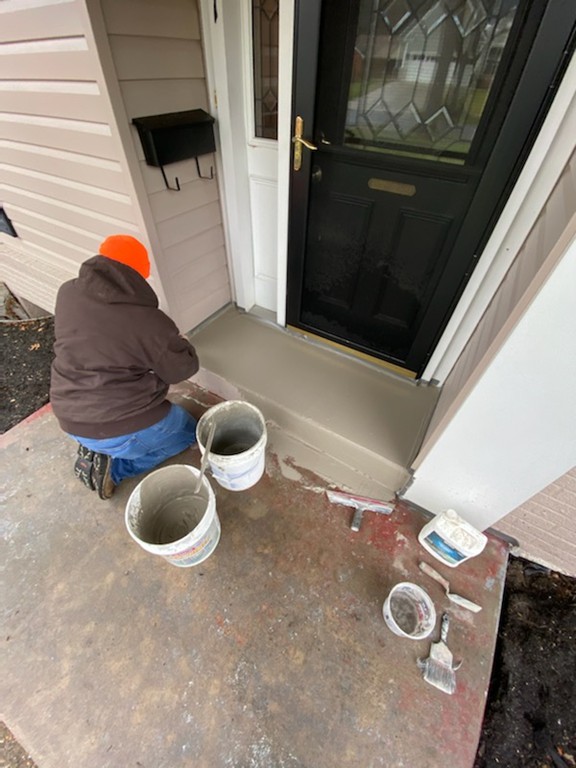
 Before pictures of a porch patio we power washed, repaired using polymer cement, applied primer, and (2) coats of elastomeric Saf-T-Dek grey paint.
 Before pictures of a porch patio we power washed, repaired using polymer cement, applied primer, and (2) coats of elastomeric Saf-T-Dek grey paint.
 Before pictures of a porch patio we power washed, repaired using polymer cement, applied primer, and (2) coats of elastomeric Saf-T-Dek grey paint.
 Before pictures of a porch patio we power washed, repaired using polymer cement, applied primer, and (2) coats of elastomeric Saf-T-Dek grey paint.
 Before pictures of a porch patio we power washed, repaired using polymer cement, applied primer, and (2) coats of elastomeric Saf-T-Dek grey paint.
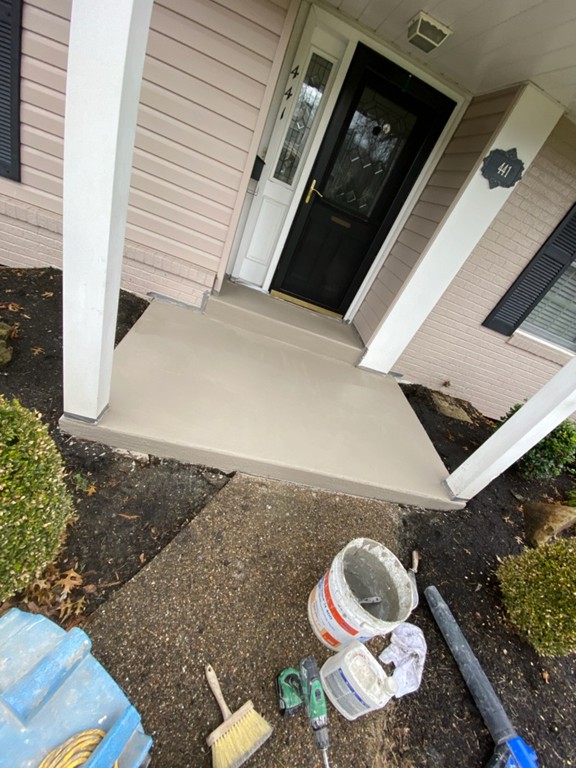
 After pictures of a porch patio we power washed, repaired using polymer cement, applied primer, and (2) coats of elastomeric Saf-T-Dek grey paint.
 After pictures of a porch patio we power washed, repaired using polymer cement, applied primer, and (2) coats of elastomeric Saf-T-Dek grey paint.
 After pictures of a porch patio we power washed, repaired using polymer cement, applied primer, and (2) coats of elastomeric Saf-T-Dek grey paint.
 After pictures of a porch patio we power washed, repaired using polymer cement, applied primer, and (2) coats of elastomeric Saf-T-Dek grey paint.
 After pictures of a porch patio we power washed, repaired using polymer cement, applied primer, and (2) coats of elastomeric Saf-T-Dek grey paint.
 Before pictures of a porch patio and set of steps we power washed, repaired, resurfaced, applied primer, and (2) coats of elastomeric Saf-T-Dek grey paint.
 Before pictures of a porch patio and set of steps we power washed, repaired, resurfaced, applied primer, and (2) coats of elastomeric Saf-T-Dek grey paint.
 Before pictures of a porch patio and set of steps we power washed, repaired, resurfaced, applied primer, and (2) coats of elastomeric Saf-T-Dek grey paint.
 Before pictures of a porch patio and set of steps we power washed, repaired, resurfaced, applied primer, and (2) coats of elastomeric Saf-T-Dek grey paint.
 Before pictures of a porch patio and set of steps we power washed, repaired, resurfaced, applied primer, and (2) coats of elastomeric Saf-T-Dek grey paint.
 Before pictures of a porch patio and set of steps we power washed, repaired, resurfaced, applied primer, and (2) coats of elastomeric Saf-T-Dek grey paint.
 Before pictures of a porch patio and set of steps we power washed, repaired, resurfaced, applied primer, and (2) coats of elastomeric Saf-T-Dek grey paint.
 Before pictures of a porch patio and set of steps we power washed, repaired, resurfaced, applied primer, and (2) coats of elastomeric Saf-T-Dek grey paint.
 Before pictures of a porch patio and set of steps we power washed, repaired, resurfaced, applied primer, and (2) coats of elastomeric Saf-T-Dek grey paint.
 During pictures of a porch patio and set up steps we power washed, repaired, resurfaced, applied primer, and (2) coats of elastomeric Saf-T-Dek grey paint.
 After pictures of a porch patio and set up steps we power washed, repaired, resurfaced, applied primer, and (2) coats of elastomeric Saf-T-Dek grey paint.
 After pictures of a porch patio and set up steps we power washed, repaired, resurfaced, applied primer, and (2) coats of elastomeric Saf-T-Dek grey paint.
 After pictures of a porch patio and set up steps we power washed, repaired, resurfaced, applied primer, and (2) coats of elastomeric Saf-T-Dek grey paint.
 After pictures of a porch patio and set up steps we power washed, repaired, resurfaced, applied primer, and (2) coats of elastomeric Saf-T-Dek grey paint.
 After pictures of a porch patio and set up steps we power washed, repaired, resurfaced, applied primer, and (2) coats of elastomeric Saf-T-Dek grey paint.
 After pictures of a porch patio and set up steps we power washed, repaired, resurfaced, applied primer, and (2) coats of elastomeric Saf-T-Dek grey paint.
 After pictures of a porch patio and set up steps we power washed, repaired, resurfaced, applied primer, and (2) coats of elastomeric Saf-T-Dek grey paint.
 After pictures of a porch patio and set up steps we power washed, repaired, resurfaced, applied primer, and (2) coats of elastomeric Saf-T-Dek grey paint.
 Before and after pictures of a concrete porch, railing, and steps we repaired and painted. First, we power washed using high pressure to properly clean. Second, we made all repairs using polymer cement. Next, resurface repairs with polymer cement. Finally, for the final coat we applied (2) coats of putty colored Saf-T-Deck elastomeric coating with non-skid surface.
 Before and after pictures of a concrete porch, railing, and steps we repaired and painted. First, we power washed using high pressure to properly clean. Second, we made all repairs using polymer cement. Next, resurface repairs with polymer cement. Finally, for the final coat we applied (2) coats of putty colored Saf-T-Deck elastomeric coating with non-skid surface.
 Before and after pictures of a concrete porch, railing, and steps we repaired and painted. First, we power washed using high pressure to properly clean. Second, we made all repairs using polymer cement. Next, resurface repairs with polymer cement. Finally, for the final coat we applied (2) coats of putty colored Saf-T-Deck elastomeric coating with non-skid surface.
 Before and after pictures of a concrete porch, railing, and steps we repaired and painted. First, we power washed using high pressure to properly clean. Second, we made all repairs using polymer cement. Next, resurface repairs with polymer cement. Finally, for the final coat we applied (2) coats of putty colored Saf-T-Deck elastomeric coating with non-skid surface.
 Before and after pictures of a concrete porch, railing, and steps we repaired and painted. First, we power washed using high pressure to properly clean. Second, we made all repairs using polymer cement. Next, resurface repairs with polymer cement. Finally, for the final coat we applied (2) coats of putty colored Saf-T-Deck elastomeric coating with non-skid surface.
 Before and after pictures of a concrete porch, railing, and steps we repaired and painted. First, we power washed using high pressure to properly clean. Second, we made all repairs using polymer cement. Next, resurface repairs with polymer cement. Finally, for the final coat we applied (2) coats of putty colored Saf-T-Deck elastomeric coating with non-skid surface.
 Before and after pictures of a concrete porch, railing, and steps we repaired and painted. First, we power washed using high pressure to properly clean. Second, we made all repairs using polymer cement. Next, resurface repairs with polymer cement. Finally, for the final coat we applied (2) coats of putty colored Saf-T-Deck elastomeric coating with non-skid surface.
 Before and after pictures of a concrete porch, railing, and steps we repaired and painted. First, we power washed using high pressure to properly clean. Second, we made all repairs using polymer cement. Next, resurface repairs with polymer cement. Finally, for the final coat we applied (2) coats of putty colored Saf-T-Deck elastomeric coating with non-skid surface.
 Before and after pictures of a concrete porch, railing, and steps we repaired and painted. First, we power washed using high pressure to properly clean. Second, we made all repairs using polymer cement. Next, resurface repairs with polymer cement. Finally, for the final coat we applied (2) coats of putty colored Saf-T-Deck elastomeric coating with non-skid surface.
 Before and after pictures of a concrete porch, railing, and steps we repaired and painted. First, we power washed using high pressure to properly clean. Second, we made all repairs using polymer cement. Next, resurface repairs with polymer cement. Finally, for the final coat we applied (2) coats of putty colored Saf-T-Deck elastomeric coating with non-skid surface.
 Before and after pictures of a concrete porch, railing, and steps we repaired and painted. First, we power washed using high pressure to properly clean. Second, we made all repairs using polymer cement. Next, resurface repairs with polymer cement. Finally, for the final coat we applied (2) coats of putty colored Saf-T-Deck elastomeric coating with non-skid surface.
 Before and after pictures of a concrete porch, railing, and steps we repaired and painted. First, we power washed using high pressure to properly clean. Second, we made all repairs using polymer cement. Next, resurface repairs with polymer cement. Finally, for the final coat we applied (2) coats of putty colored Saf-T-Deck elastomeric coating with non-skid surface.
 Before and after pictures of a concrete porch, railing, and steps we repaired and painted. First, we power washed using high pressure to properly clean. Second, we made all repairs using polymer cement. Next, resurface repairs with polymer cement. Finally, for the final coat we applied (2) coats of putty colored Saf-T-Deck elastomeric coating with non-skid surface.
 Before and after pictures of a concrete porch, railing, and steps we repaired and painted. First, we power washed using high pressure to properly clean. Second, we made all repairs using polymer cement. Next, resurface repairs with polymer cement. Finally, for the final coat we applied (2) coats of putty colored Saf-T-Deck elastomeric coating with non-skid surface.
 Before and after pictures of a concrete porch, railing, and steps we repaired and painted. First, we power washed using high pressure to properly clean. Second, we made all repairs using polymer cement. Next, resurface repairs with polymer cement. Finally, for the final coat we applied (2) coats of putty colored Saf-T-Deck elastomeric coating with non-skid surface.
 Before and after pictures of a concrete porch, railing, and steps we repaired and painted. First, we power washed using high pressure to properly clean. Second, we made all repairs using polymer cement. Next, resurface repairs with polymer cement. Finally, for the final coat we applied (2) coats of putty colored Saf-T-Deck elastomeric coating with non-skid surface.
 Before and after pictures of a concrete porch, railing, and steps we repaired and painted. First, we power washed using high pressure to properly clean. Second, we made all repairs using polymer cement. Next, resurface repairs with polymer cement. Finally, for the final coat we applied (2) coats of putty colored Saf-T-Deck elastomeric coating with non-skid surface.
 Before and after pictures of a concrete porch, railing, and steps we repaired and painted. First, we power washed using high pressure to properly clean. Second, we made all repairs using polymer cement. Next, resurface repairs with polymer cement. Finally, for the final coat we applied (2) coats of putty colored Saf-T-Deck elastomeric coating with non-skid surface.
 Before and after pictures of a concrete porch, railing, and steps we repaired and painted. First, we power washed using high pressure to properly clean. Second, we made all repairs using polymer cement. Next, resurface repairs with polymer cement. Finally, for the final coat we applied (2) coats of putty colored Saf-T-Deck elastomeric coating with non-skid surface.
 Before and after pictures of a concrete porch, railing, and steps we repaired and painted. First, we power washed using high pressure to properly clean. Second, we made all repairs using polymer cement. Next, resurface repairs with polymer cement. Finally, for the final coat we applied (2) coats of putty colored Saf-T-Deck elastomeric coating with non-skid surface.
 A front porch we power washed, did repairs, and resurfaced with a brown tint color.
 A front porch we power washed, did repairs, and resurfaced with a brown tint color.
 A front porch we power washed, did repairs, and resurfaced with a brown tint color.
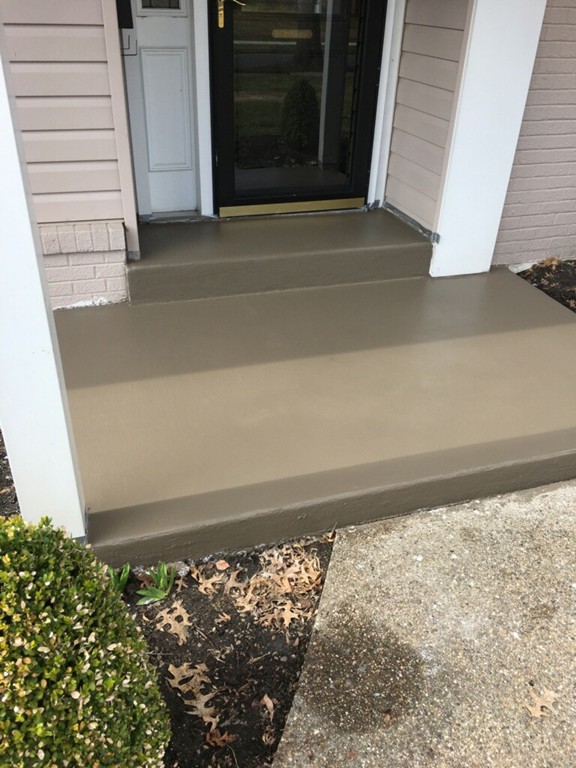 A front porch we power washed, did repairs, and resurfaced with a brown tint color.
 Before and after pictures of a front entrance to a daycare that we cleaned, resurfaced with (2) coats of polymer cement. For the final look we painted using a solid stain.
 Before and after pictures of a front entrance to a daycare that we cleaned, resurfaced with (2) coats of polymer cement. For the final look we painted using a solid stain.
 Before and after pictures of a front entrance to a daycare that we cleaned, resurfaced with (2) coats of polymer cement. For the final look we painted using a solid stain.
 Before and after pictures of a front entrance to a daycare that we cleaned, resurfaced with (2) coats of polymer cement. For the final look we painted using a solid stain.
 Before and after pictures of a front entrance to a daycare that we cleaned, resurfaced with (2) coats of polymer cement. For the final look we painted using a solid stain.
 Before and after pictures of a front entrance to a daycare that we cleaned, resurfaced with (2) coats of polymer cement. For the final look we painted using a solid stain.
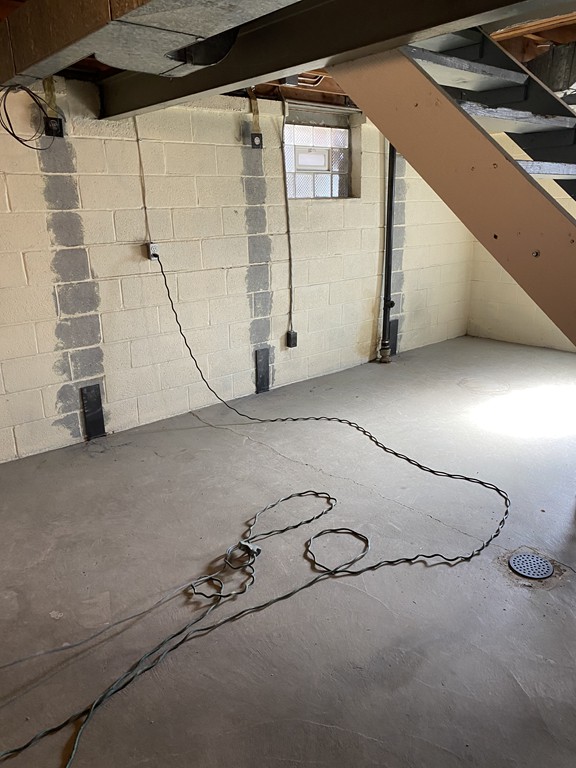
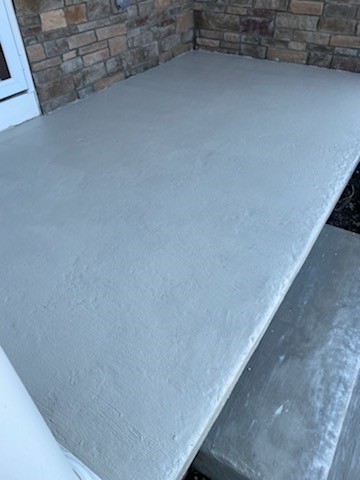
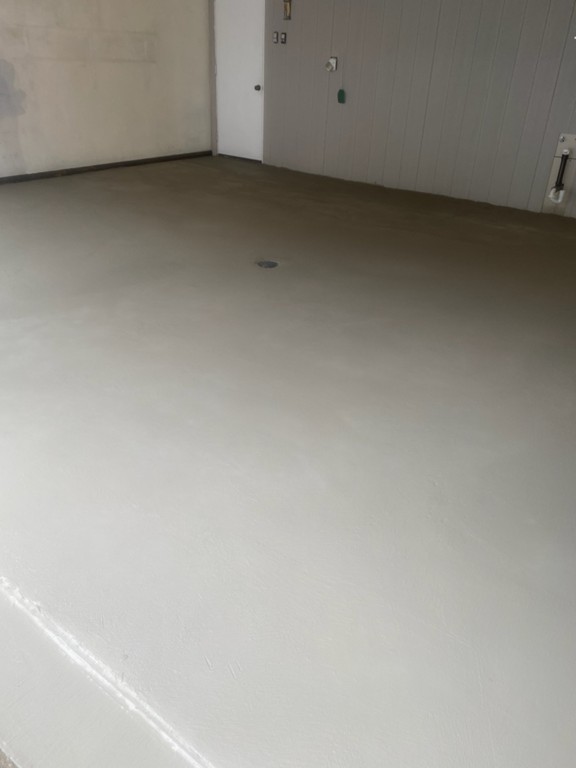
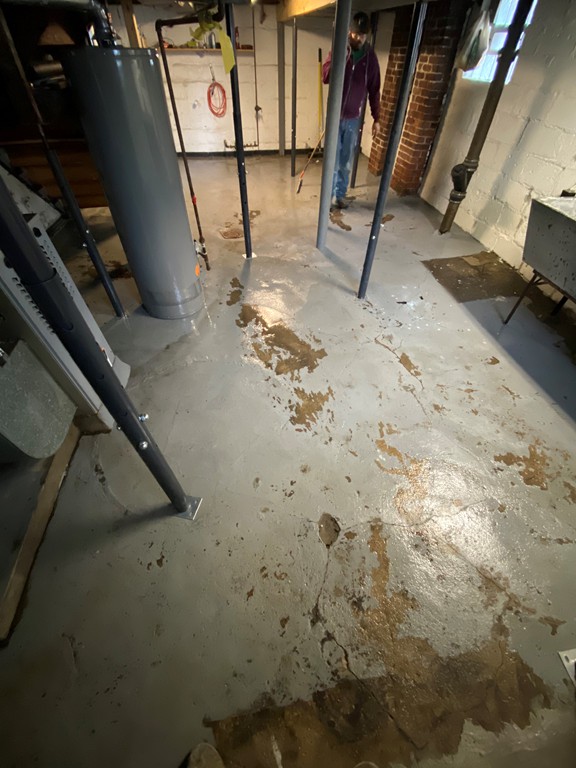
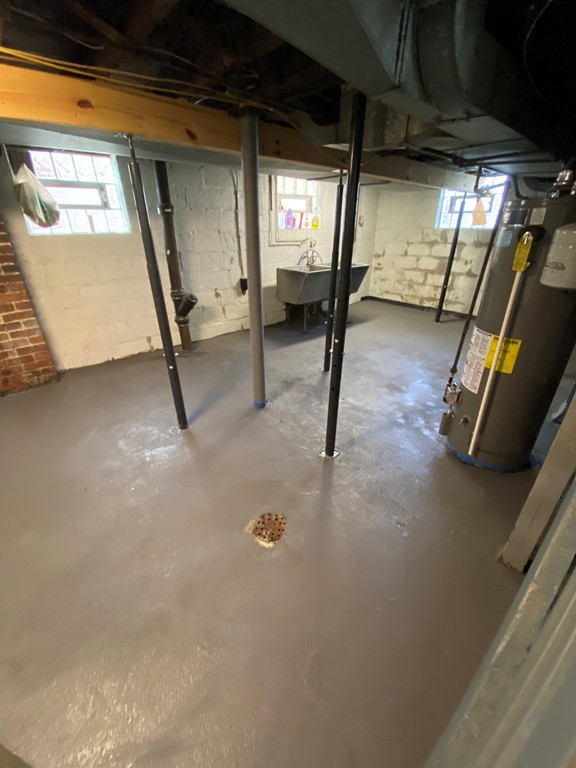
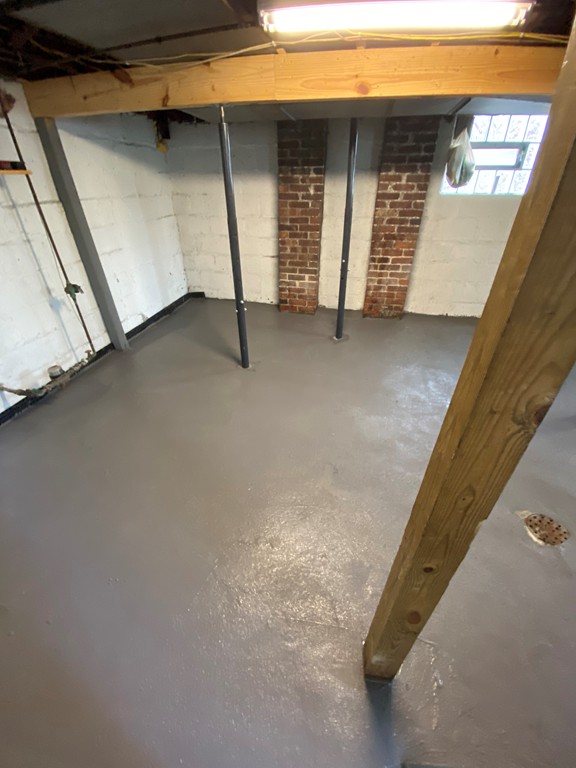
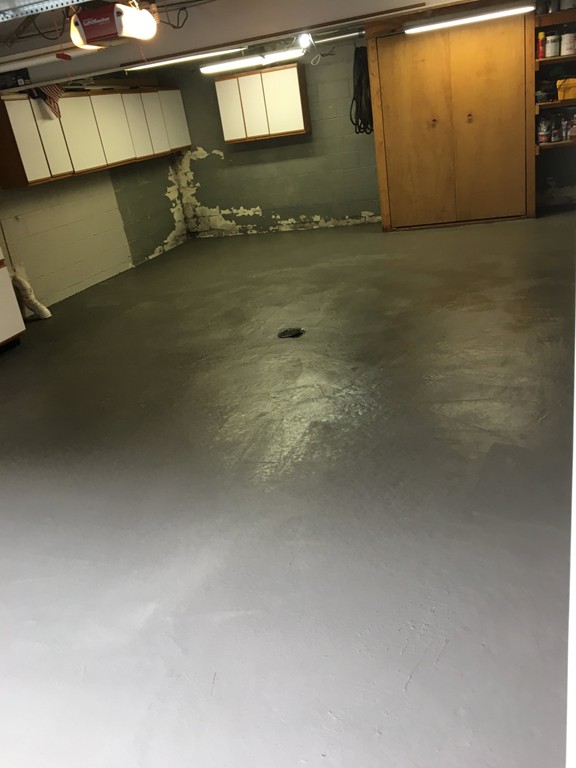
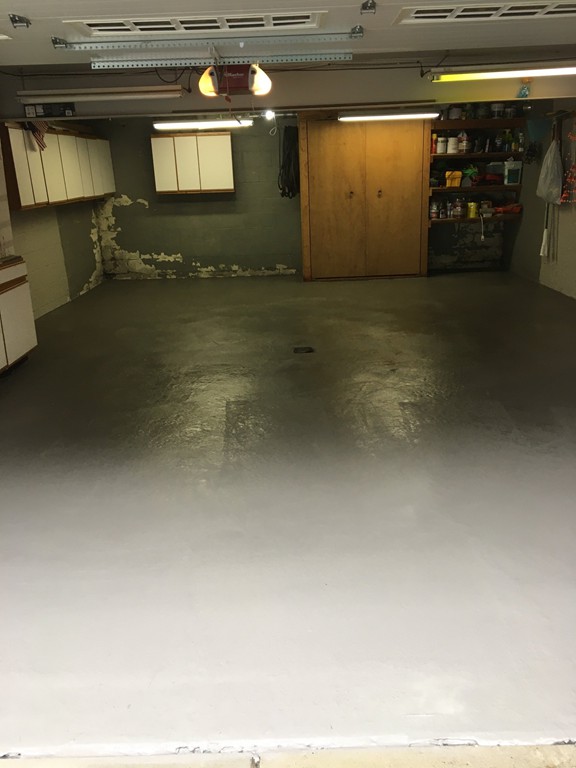
 A resurface job we did in a basement. Filled in low spots and patched all repairs where needed using polymer cement. Finished with a polymer cement resurfacer that was tinted for a clean grey look.
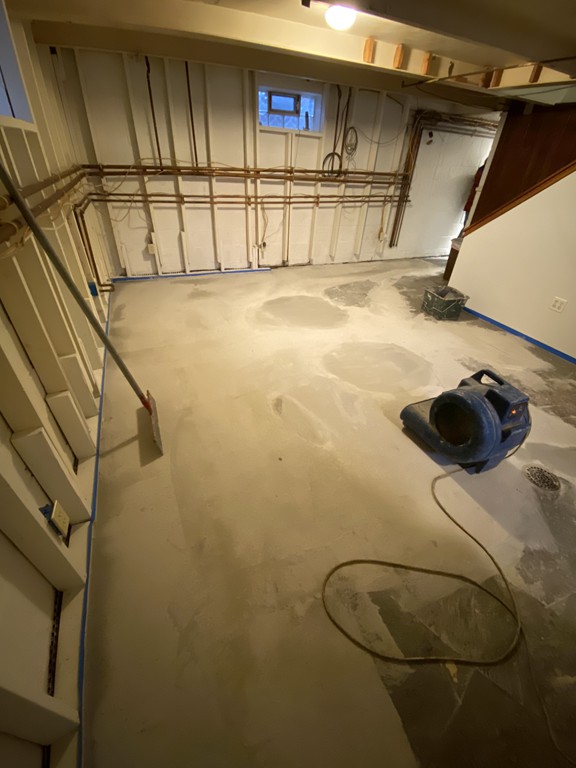 A resurface job we did in a basement. Filled in low spots and patched all repairs where needed using polymer cement. Finished with a polymer cement resurfacer that was tinted for a clean grey look.
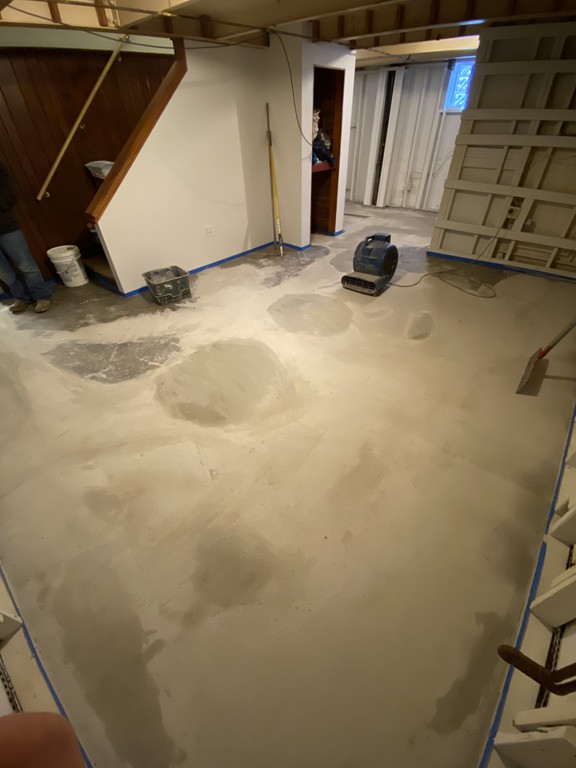 A resurface job we did in a basement. Filled in low spots and patched all repairs where needed using polymer cement. Finished with a polymer cement resurfacer that was tinted for a clean grey look.
 A resurface job we did in a basement. Filled in low spots and patched all repairs where needed using polymer cement. Finished with a polymer cement resurfacer that was tinted for a clean grey look.
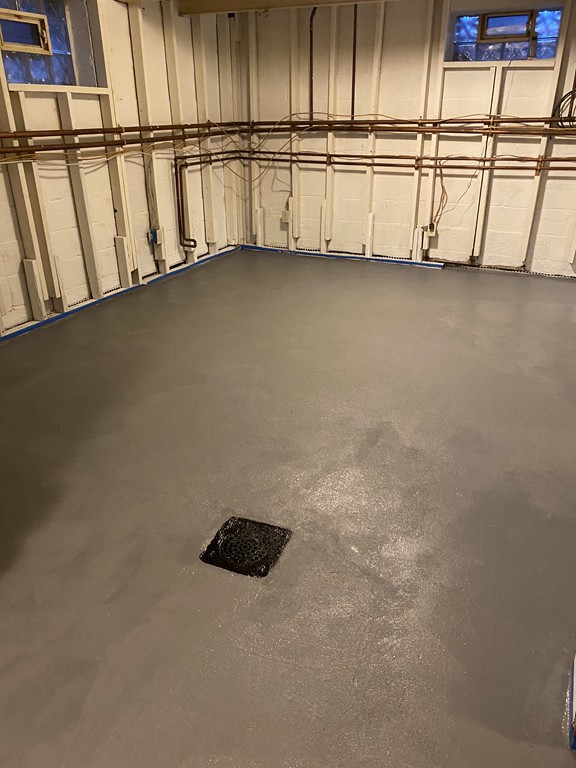 A resurface job we did in a basement. Filled in low spots and patched all repairs where needed using polymer cement. Finished with a polymer cement resurfacer that was tinted for a clean grey look.
 A porch we repaired, resurfaced, and finished with 2 coats of Putty colored Safe-T-Deck.
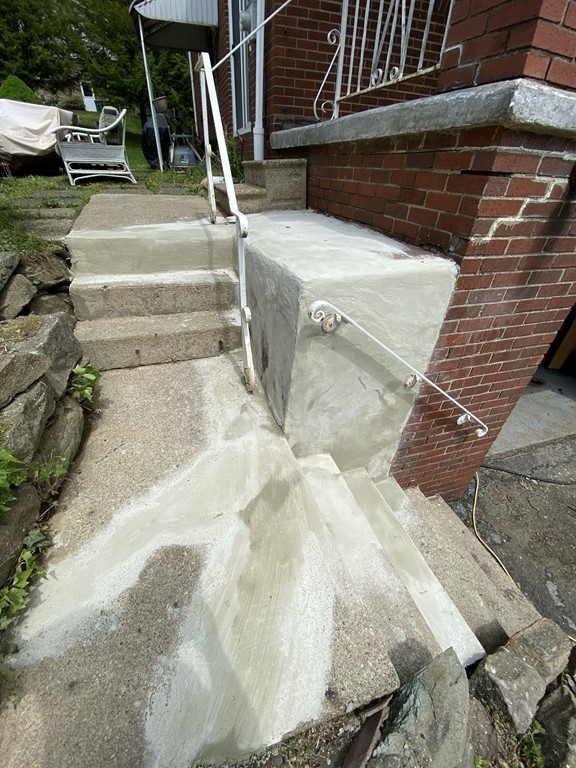
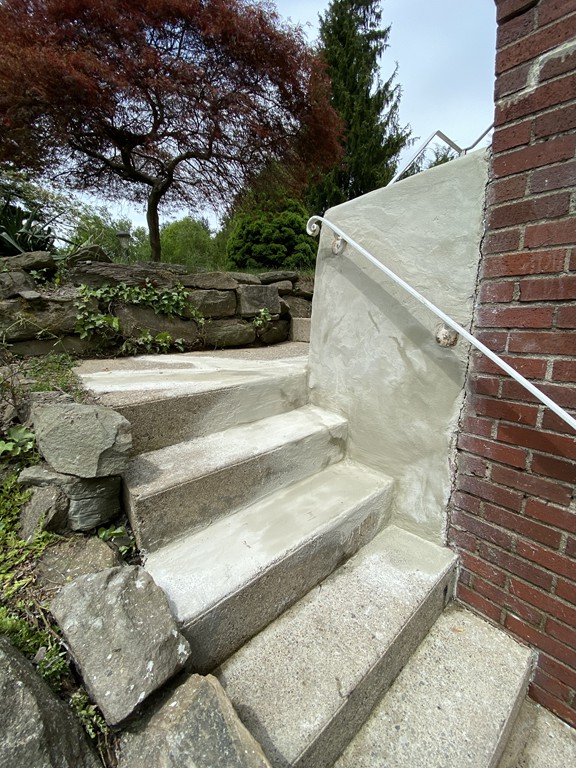
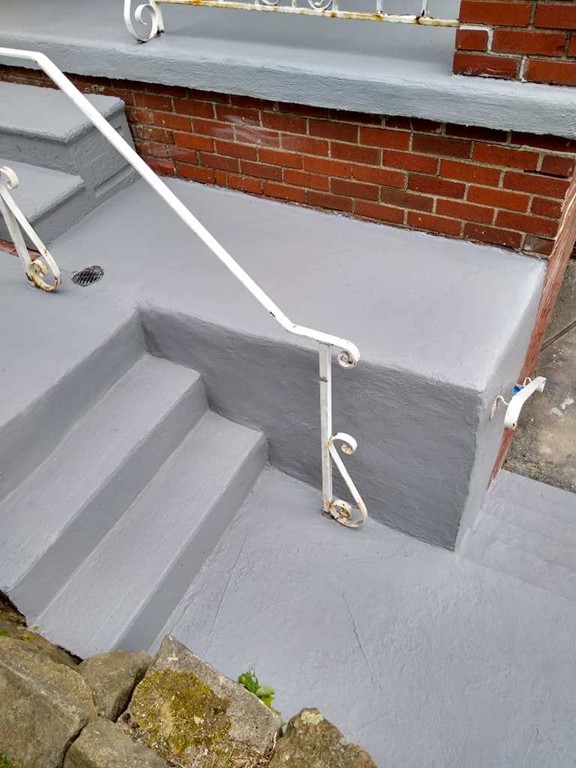
 Before and after of a step repair job using pins to stabilize the railing. Built the corner and side of the step with our polymer cement product and finished by resurfacing all repairs.
 Before and after of a step repair job using pins to stabilize the railing. Built the corner and side of the step with our polymer cement product and finished by resurfacing all repairs.
 Before and after of a step repair job using pins to stabilize the railing. Built the corner and side of the step with our polymer cement product and finished by resurfacing all repairs.
 Before and after of a step repair job using pins to stabilize the railing. Built the corner and side of the step with our polymer cement product and finished by resurfacing all repairs.
 Before and after of a step repair job using pins to stabilize the railing. Built the corner and side of the step with our polymer cement product and finished by resurfacing all repairs.
 Before and after of a step repair job using pins to stabilize the railing. Built the corner and side of the step with our polymer cement product and finished by resurfacing all repairs.
 Before and after of a step repair job using pins to stabilize the railing. Built the corner and side of the step with our polymer cement product and finished by resurfacing all repairs.
 The porch had cracks and pieces missing from the steps. Our team repaired all cracks and rebuilt steps where needed using polymer cement. The finish look is a resurfacer on the entire porch and steps.
 The porch had cracks and pieces missing from the steps. Our team repaired all cracks and rebuilt steps where needed using polymer cement. The finish look is a resurfacer on the entire porch and steps.
 The porch had cracks and pieces missing from the steps. Our team repaired all cracks and rebuilt steps where needed using polymer cement. The finish look is a resurfacer on the entire porch and steps.
 The porch had cracks and pieces missing from the steps. Our team repaired all cracks and rebuilt steps where needed using polymer cement. The finish look is a resurfacer on the entire porch and steps.
 The porch had cracks and pieces missing from the steps. Our team repaired all cracks and rebuilt steps where needed using polymer cement. The finish look is a resurfacer on the entire porch and steps.
 The porch had cracks and pieces missing from the steps. Our team repaired all cracks and rebuilt steps where needed using polymer cement. The finish look is a resurfacer on the entire porch and steps.
 The porch had cracks and pieces missing from the steps. Our team repaired all cracks and rebuilt steps where needed using polymer cement. The finish look is a resurfacer on the entire porch and steps.
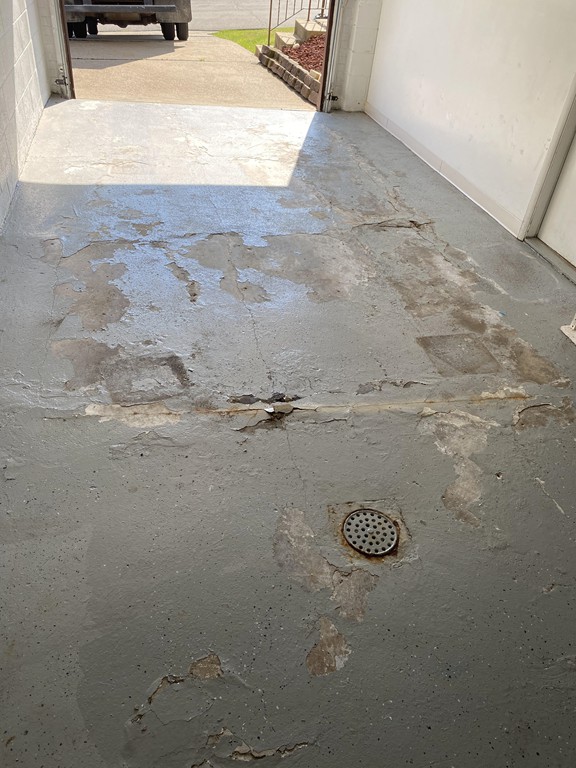
 These are some repairs we did in a warehouse the gets a loy of wear and tear on the floor. We used a product called Flexcrete to make the repairs to the floor. This product is a very durable and strong product.">
 These are some repairs we did in a warehouse the gets a loy of wear and tear on the floor. We used a product called Flexcrete to make the repairs to the floor. This product is a very durable and strong product.">
 These are some repairs we did in a warehouse the gets a loy of wear and tear on the floor. We used a product called Flexcrete to make the repairs to the floor. This product is a very durable and strong product.">
 These are some repairs we did in a warehouse the gets a loy of wear and tear on the floor. We used a product called Flexcrete to make the repairs to the floor. This product is a very durable and strong product.">
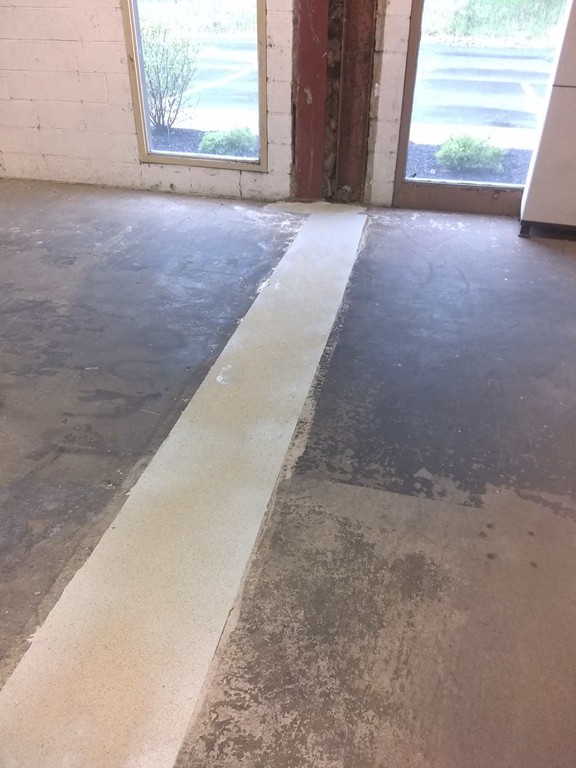 These are some repairs we did in a warehouse the gets a loy of wear and tear on the floor. We used a product called Flexcrete to make the repairs to the floor. This product is a very durable and strong product.">
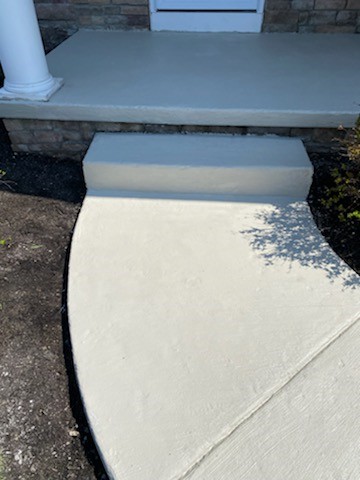
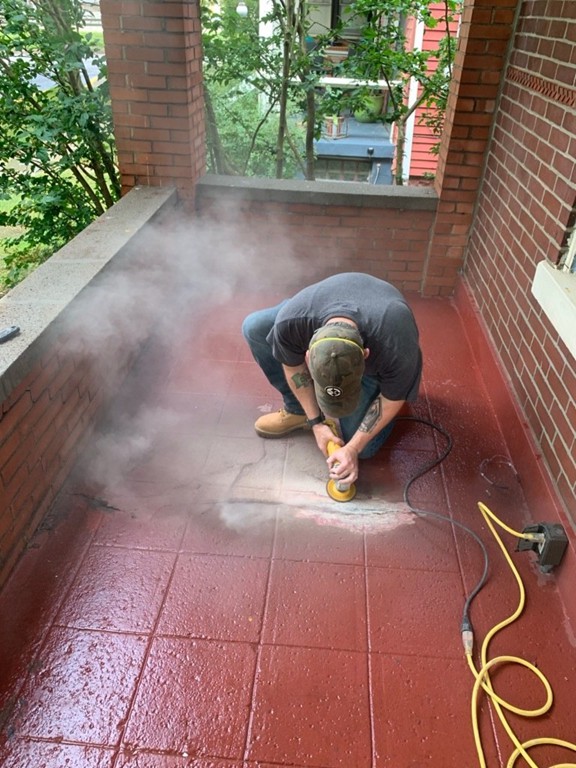
 This porch needed power washing, crack repair, and rebuilt where some places crumbled
 This porch needed power washing, crack repair, and rebuilt where some places crumbled
 Flexible urethane was used to seal small cracks and polymer cement for larger damage
 Flexible urethane was used to seal small cracks and polymer cement for larger damage
 Flexible urethane was used to seal small cracks and polymer cement for larger damage
 Flexible urethane was used to seal small cracks and polymer cement for larger damage
 The finish for the porch was our Putty colored Saf-T-Deck elastomeric sealant with anti-skid surface
 The finish for the porch was our Putty colored Saf-T-Deck elastomeric sealant with anti-skid surface
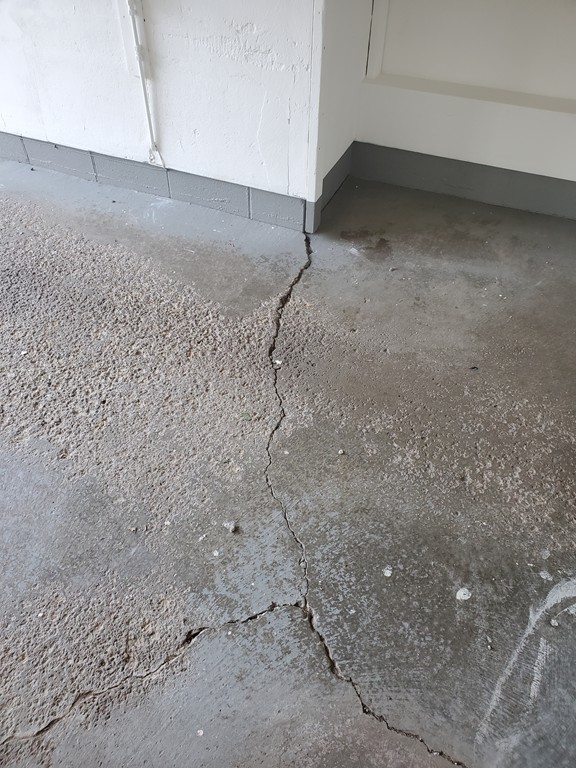
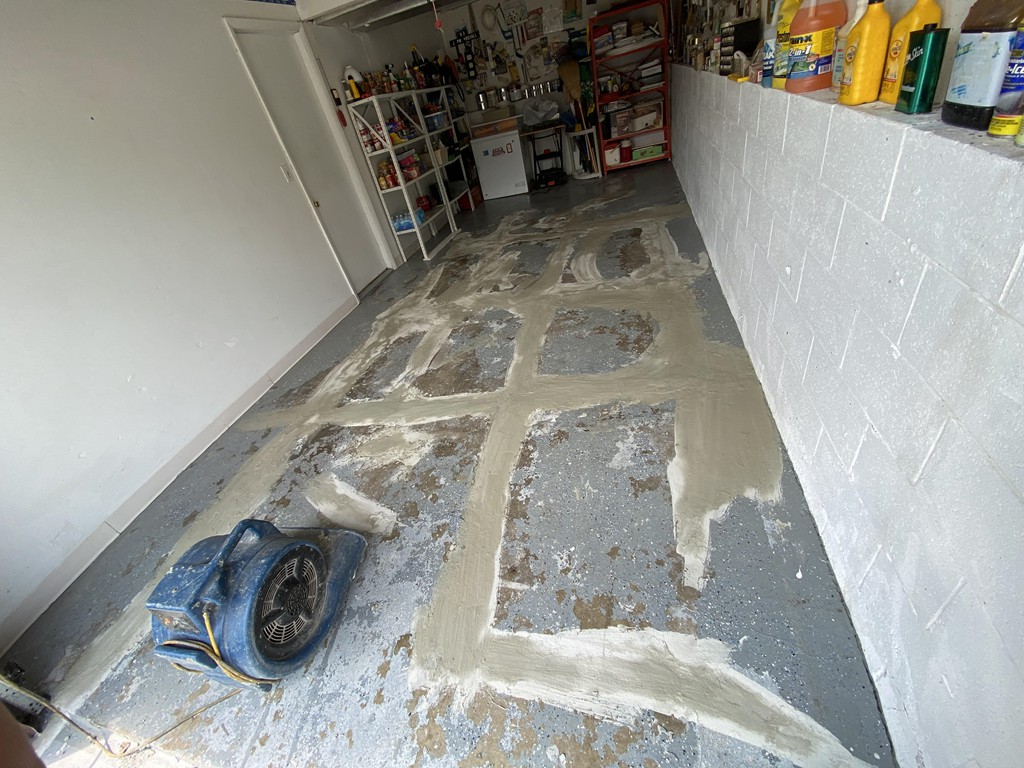
 This basement floor had cracks and damage from years of wear and tear
 This basement floor had cracks and damage from years of wear and tear
 Here you can see how the team evened out the floor and repaired all of the damaged area using polymer cements before applying the finish
 Here you can see how the team evened out the floor and repaired all of the damaged area using polymer cements before applying the finish
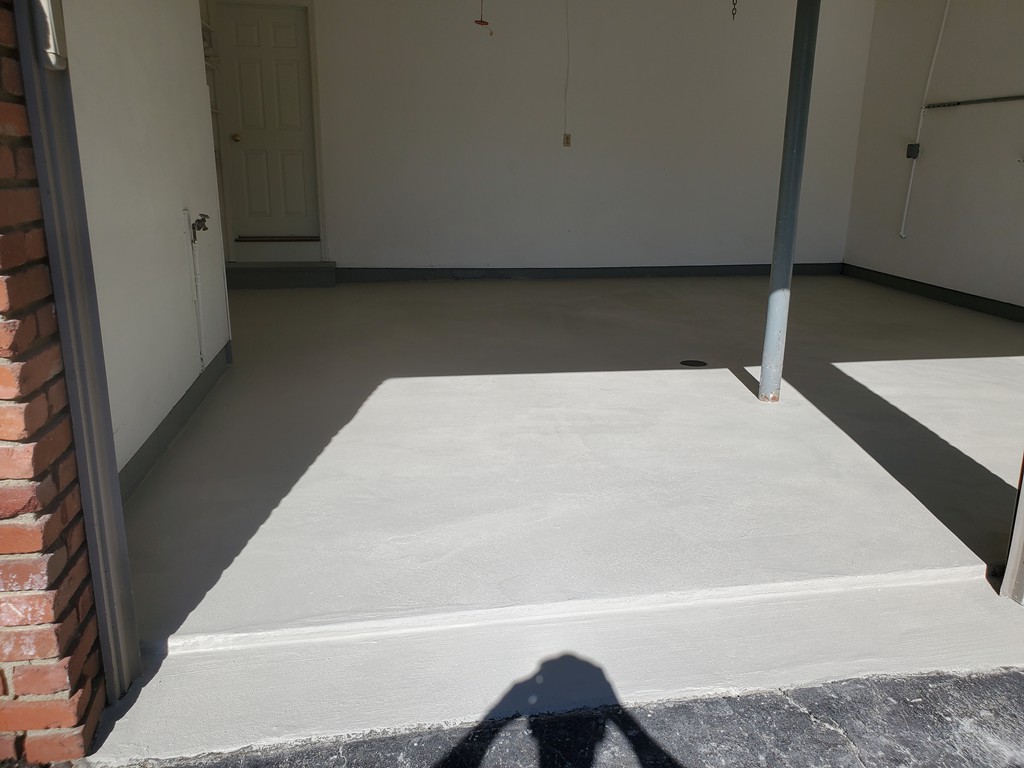
 After repairs, the team resurfaced the entire basement floor using a skim coat to provide a neat, fresh finish and an extra layer of protection
 After repairs, the team resurfaced the entire basement floor using a skim coat to provide a neat, fresh finish and an extra layer of protection
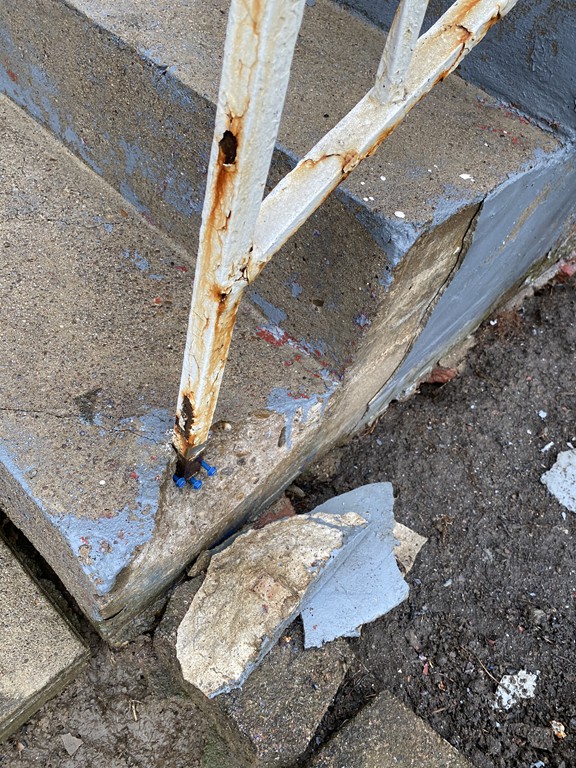
 These steps had severe damage, including cracking and chunks missing.
 These steps had severe damage, including cracking and chunks missing.
 These steps had severe damage, including cracking and chunks missing.
 These steps had severe damage, including cracking and chunks missing.
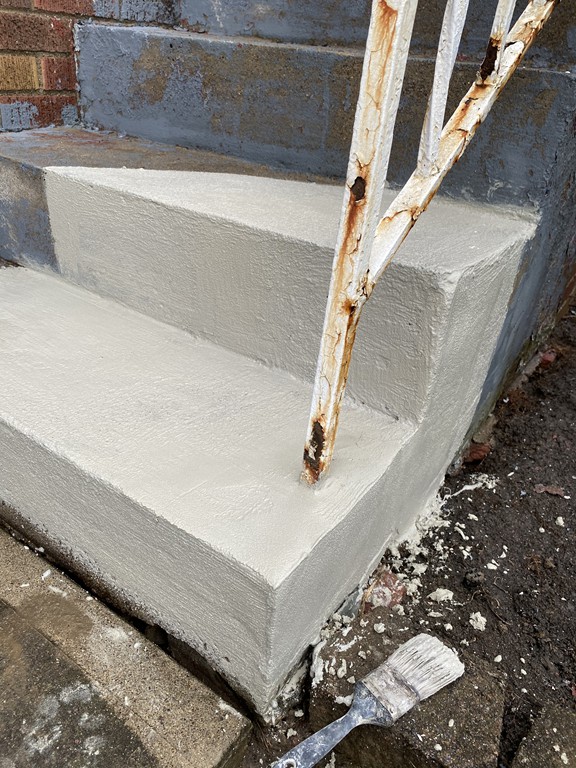
 We were able to repair cracks, rebuild areas which were missing and resurface everything but the brick sections.
 We were able to repair cracks, rebuild areas which were missing and resurface everything but the brick sections.
 We were able to repair cracks, rebuild areas which were missing and resurface everything but the brick sections.
 This garage floor needing power washing, crack repair, and resurfacing. The surface was finished with a skim coat of resurfacer
 This garage floor needing power washing, crack repair, and resurfacing. The surface was finished with a skim coat of resurfacer
 This garage floor needing power washing, crack repair, and resurfacing. The surface was finished with a skim coat of resurfacer
 This garage floor needing power washing, crack repair, and resurfacing. The surface was finished with a skim coat of resurfacer
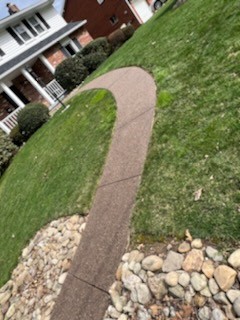
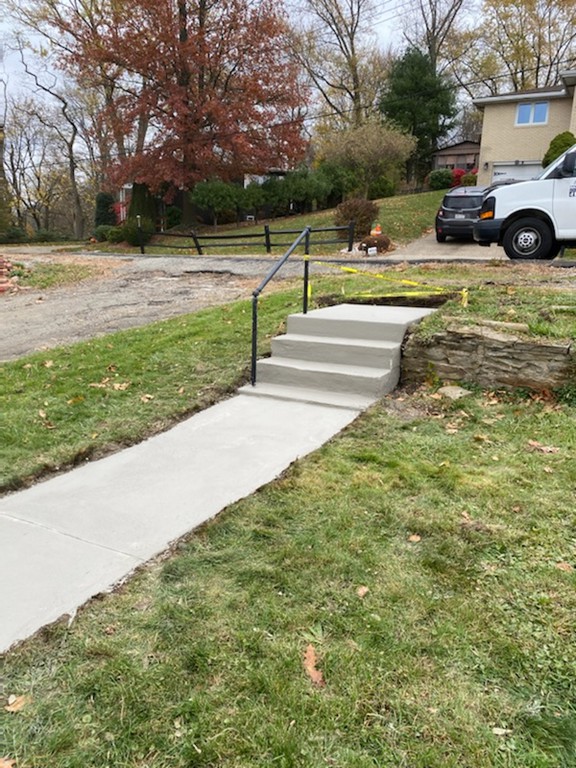
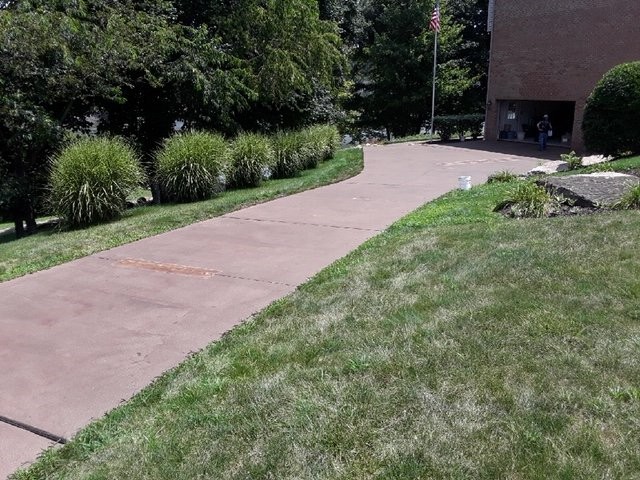
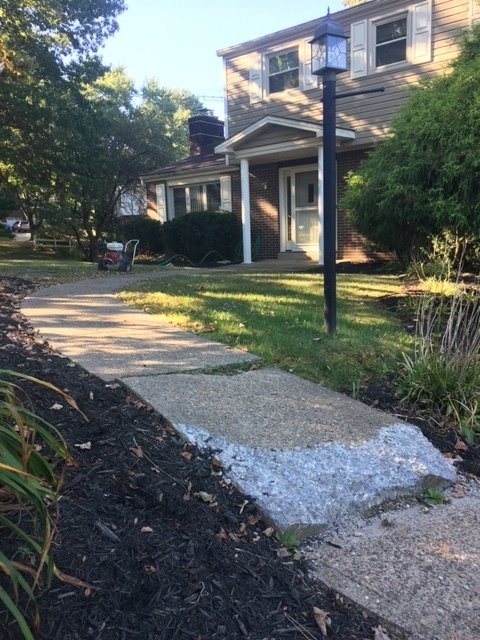 The end of this sidewalk needed to be rebuilt. We started by power washing to clear the surface. The we rebuilt the front and back corner with polymer cement before resurfacing the entire pad so that repairs are hidden and it has a fresh look.
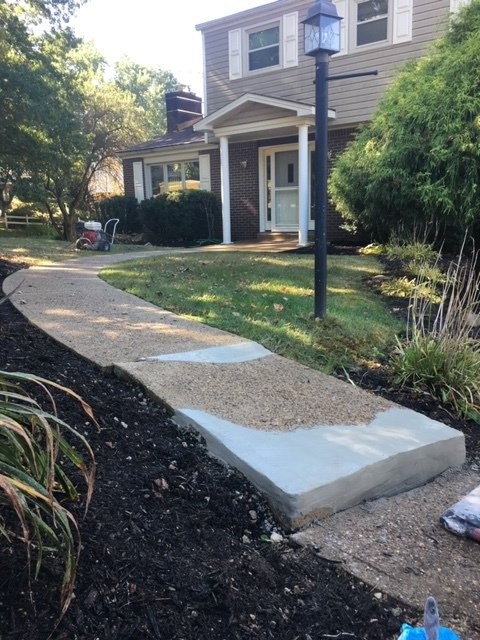 The end of this sidewalk needed to be rebuilt. We started by power washing to clear the surface. The we rebuilt the front and back corner with polymer cement before resurfacing the entire pad so that repairs are hidden and it has a fresh look.
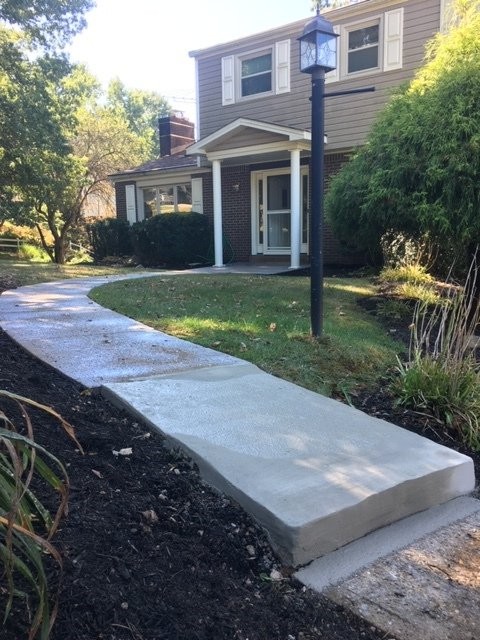 The end of this sidewalk needed to be rebuilt. We started by power washing to clear the surface. The we rebuilt the front and back corner with polymer cement before resurfacing the entire pad so that repairs are hidden and it has a fresh look.
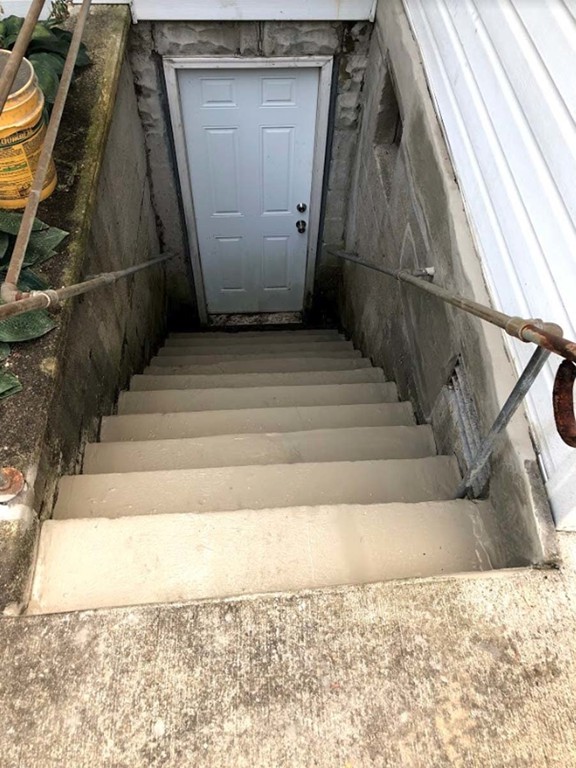
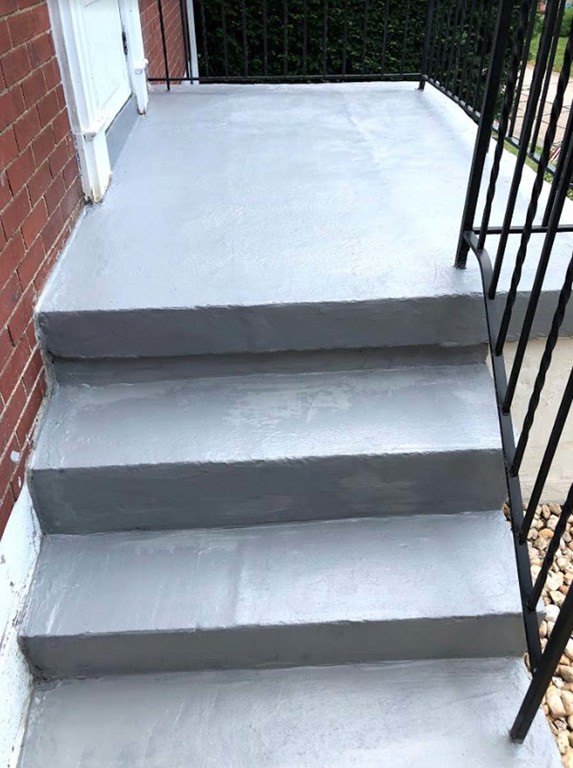
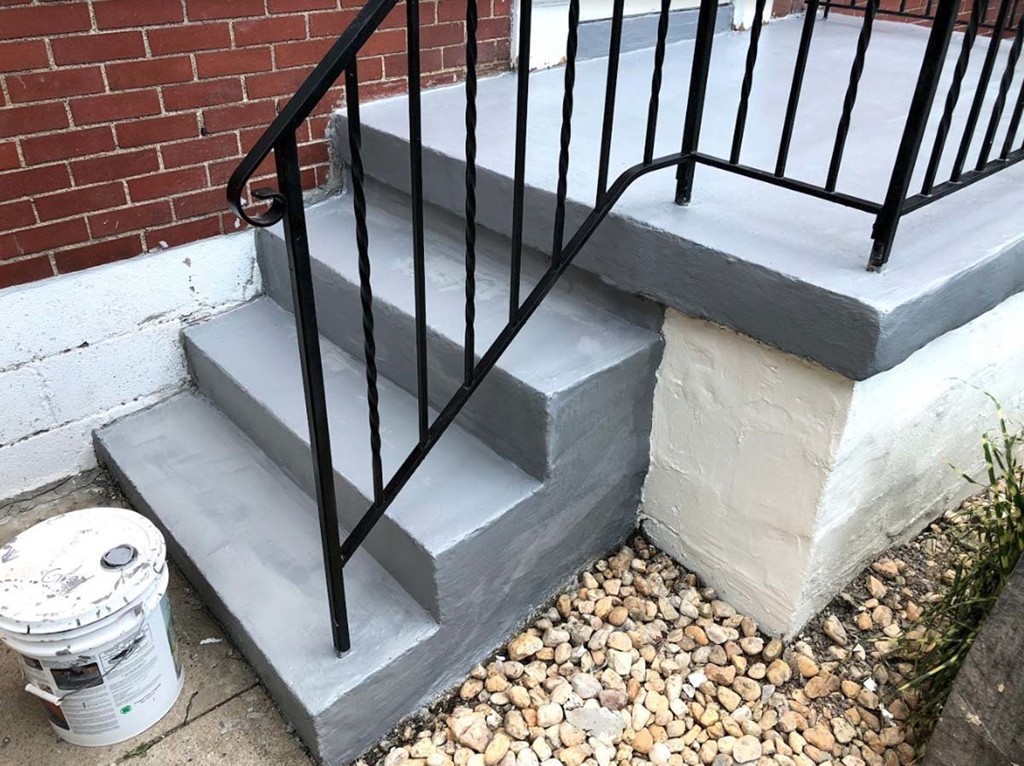
 These steps required crack repair and a new finish. The finish is gray Saf-T-Deck elastomeric coating with non-skid surface.
 These steps required crack repair and a new finish. The finish is gray Saf-T-Deck elastomeric coating with non-skid surface.
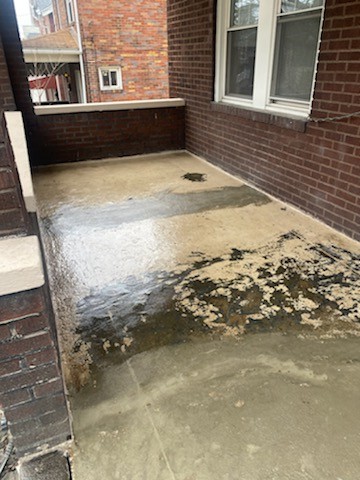
 Though they do not show up well in the before photo, the second photo shows where cracks have been repaired on the back patio.
 Though they do not show up well in the before photo, the second photo shows where cracks have been repaired on the back patio.
 Though they do not show up well in the before photo, the second photo shows where cracks have been repaired on the back patio.
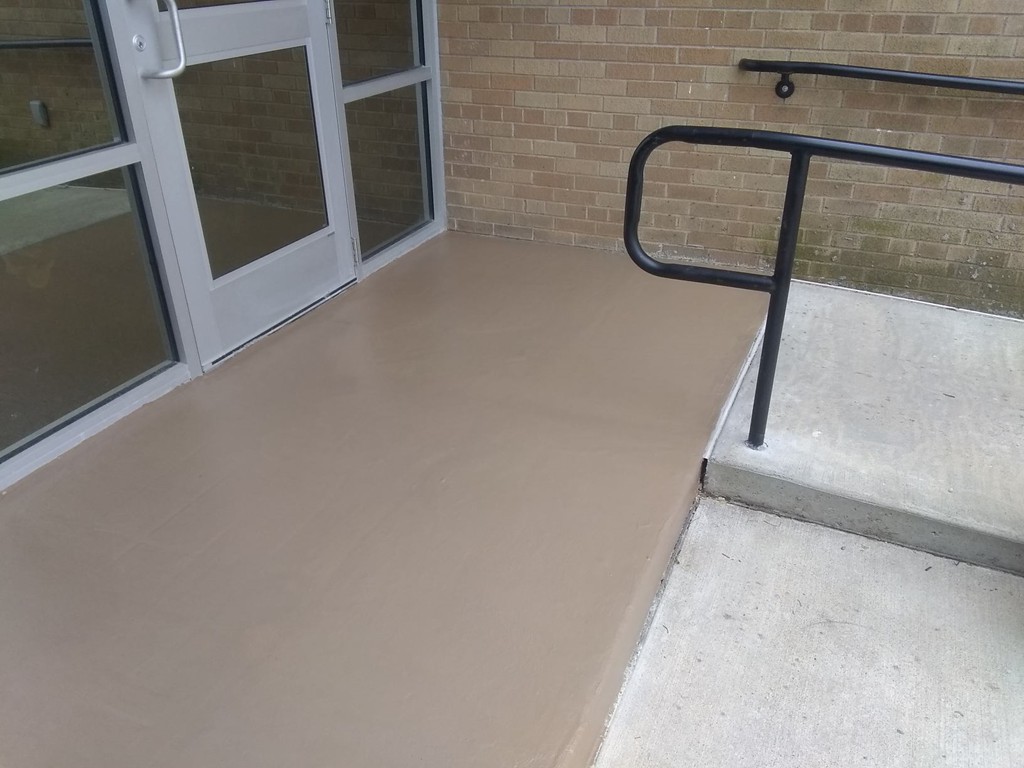
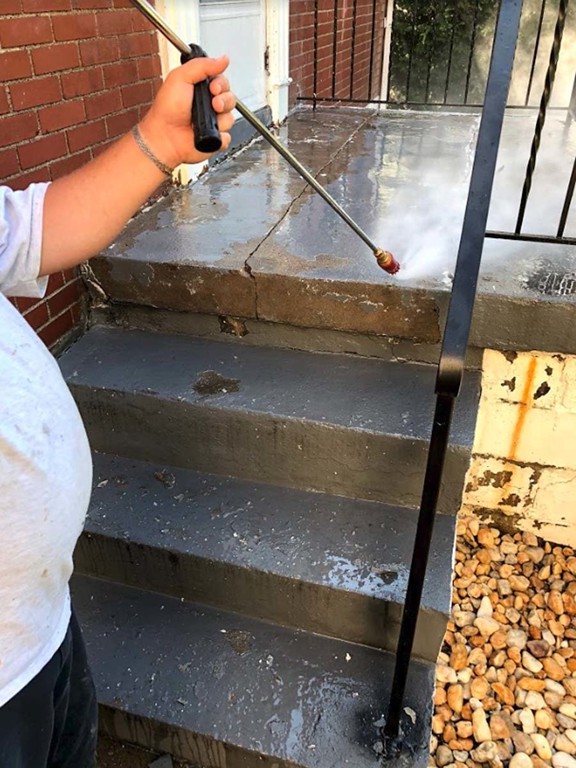
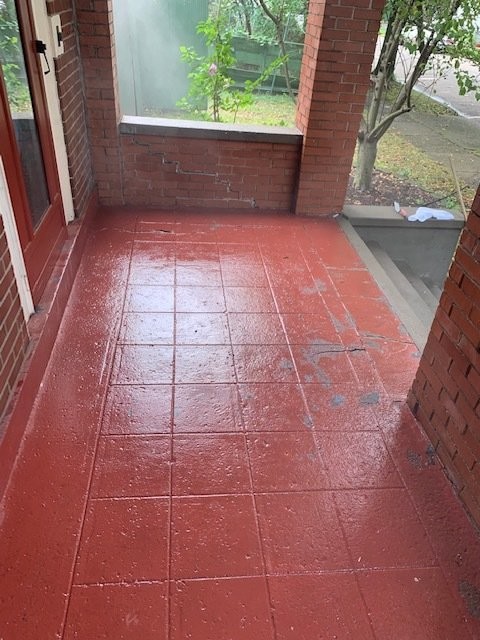 The front porch needed crack repair and restoration. After power washing, we V-out cracks to prepare them for flexible urethane, which contracts and expands with the freeze/thaw cycle so cracks are always protected for further damage. The finish coat on this porch was the terracotta colored Saf-T-Deck elastomeric coating with non-skid surface
 The front porch needed crack repair and restoration. After power washing, we V-out cracks to prepare them for flexible urethane, which contracts and expands with the freeze/thaw cycle so cracks are always protected for further damage. The finish coat on this porch was the terracotta colored Saf-T-Deck elastomeric coating with non-skid surface
 The front porch needed crack repair and restoration. After power washing, we V-out cracks to prepare them for flexible urethane, which contracts and expands with the freeze/thaw cycle so cracks are always protected for further damage. The finish coat on this porch was the terracotta colored Saf-T-Deck elastomeric coating with non-skid surface"
 The front porch needed crack repair and restoration. After power washing, we V-out cracks to prepare them for flexible urethane, which contracts and expands with the freeze/thaw cycle so cracks are always protected for further damage. The finish coat on this porch was the terracotta colored Saf-T-Deck elastomeric coating with non-skid surface"
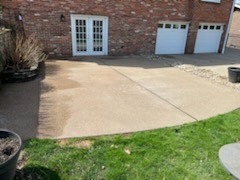
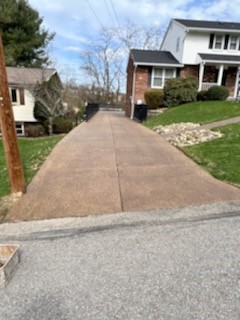
 After pressure washing, this driveway had a brown semi-transparent stain applied to give the driveway the look the customer desired.
 After pressure washing, this driveway had a brown semi-transparent stain applied to give the driveway the look the customer desired.
 After pressure washing, this driveway had a brown semi-transparent stain applied to give the driveway the look the customer desired.
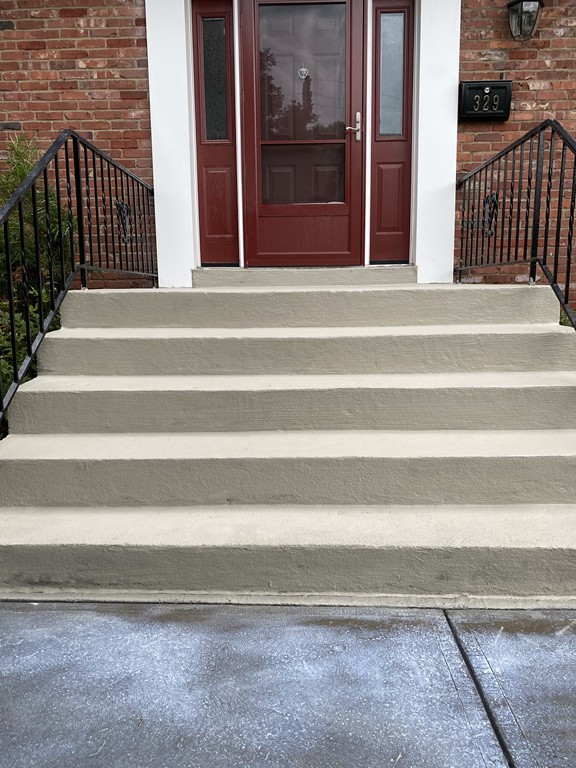
 Pressure washing and the application of a solid stain gave these steps gave them new life
 Pressure washing and the application of a solid stain gave these steps gave them new life
 After pressure washing and repairing the side of these steps, a new finish coating drastically changed their look
 After pressure washing and repairing the side of these steps, a new finish coating drastically changed their look
 After pressure washing and repairing the side of these steps, a new finish coating drastically changed their look
 After pressure washing and repairing the side of these steps, a new finish coating drastically changed their look
 After pressure washing and repairing the side of these steps, a new finish coating drastically changed their look
jquery lightbox menuby VisualLightBox.com v5.7
After pressure washing and repairing the side of these steps, a new finish coating drastically changed their look
jquery lightbox menuby VisualLightBox.com v5.7